In Salesforce, improving user experience is key to driving productivity and ensuring that users can quickly access the most important information. One way to achieve this is by leveraging Conditional Field Formatting in Dynamic Forms-enabled record pages. This powerful feature, introduced in the Winter ’25 Release, allows admins to apply dynamic formatting to fields, making critical data more visually appealing and easier to digest. With custom icons, colors, and more, you can help users instantly identify the most relevant information without having to dig through rows of data.
What is Conditional Field Formatting?
Conditional Field Formatting allows you to customize how fields appear on record pages based on specific conditions you define. These formatting rules can change the appearance of a field whether that’s by showing different custom icons —based on the field’s value or values of other fields on the page.
For example, rather than having a plain “Priority” field on a Case record, you can apply conditional formatting to display colored icons that immediately convey the urgency level green for low priority, yellow for medium, and red for high priority. This visual cue helps users quickly assess the situation and take appropriate actions without having to read through the entire record.
How Does Conditional Field Formatting Work?
Conditional formatting relies on rulesets, which are collections of rules. A rule is made up of conditions that determine how and when the formatting will appear on a field. These conditions can be based on a field’s value or even on the values of other fields on the page.
Here’s a simple breakdown of how conditional formatting works:
1. Create a Ruleset: A ruleset contains the set of conditions that you want to apply to a field. Each condition will determine which formatting is applied.
2. Assign Rules to a Field: In the Lightning App Builder, open the Dynamic Forms-enabled record page and select the field on the canvas. In the field’s property panel, there’s a Conditional Formatting property where you can assign an existing rule set or create a new one.
3. Define Formatting Conditions: Within each rule, specify when the formatting should change. For instance, you could define that when the “Priority” field equals “High,” the icon turns red and displays a sad face.
This ability to tailor field formatting based on specific criteria not only makes your pages look more appealing but also enhances the user experience by surfacing key information at a glance.
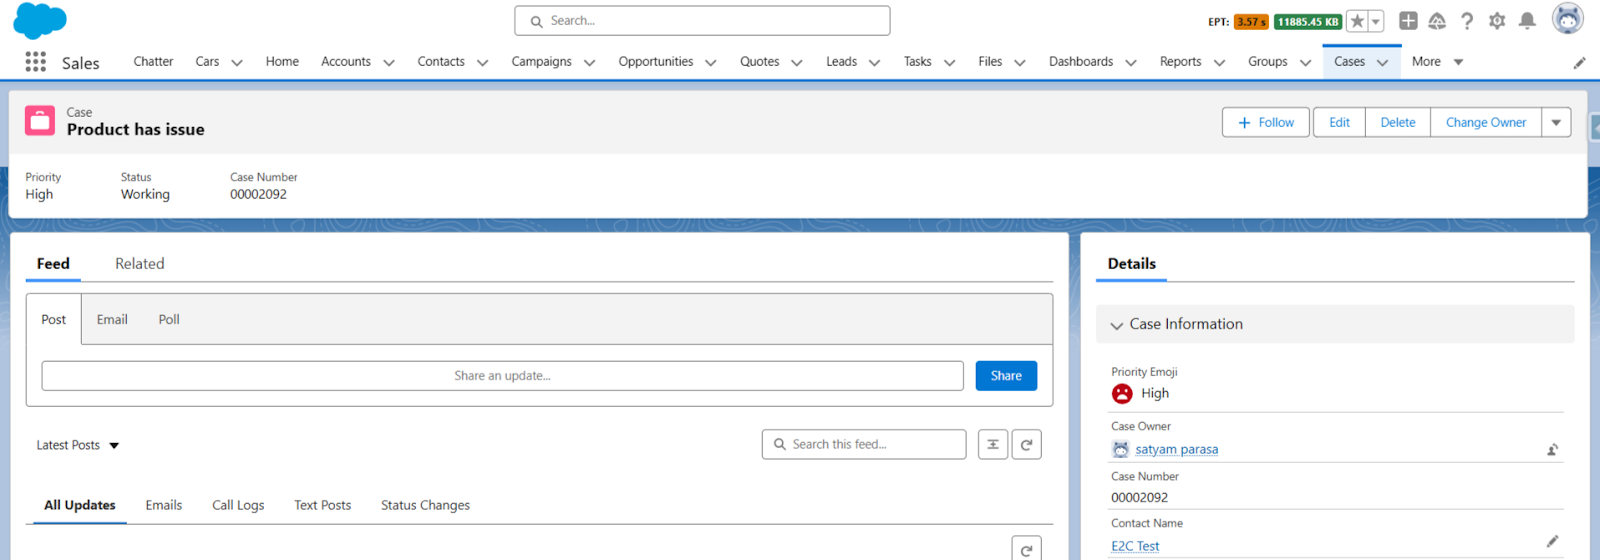
Example: Priority Field on a Case Record
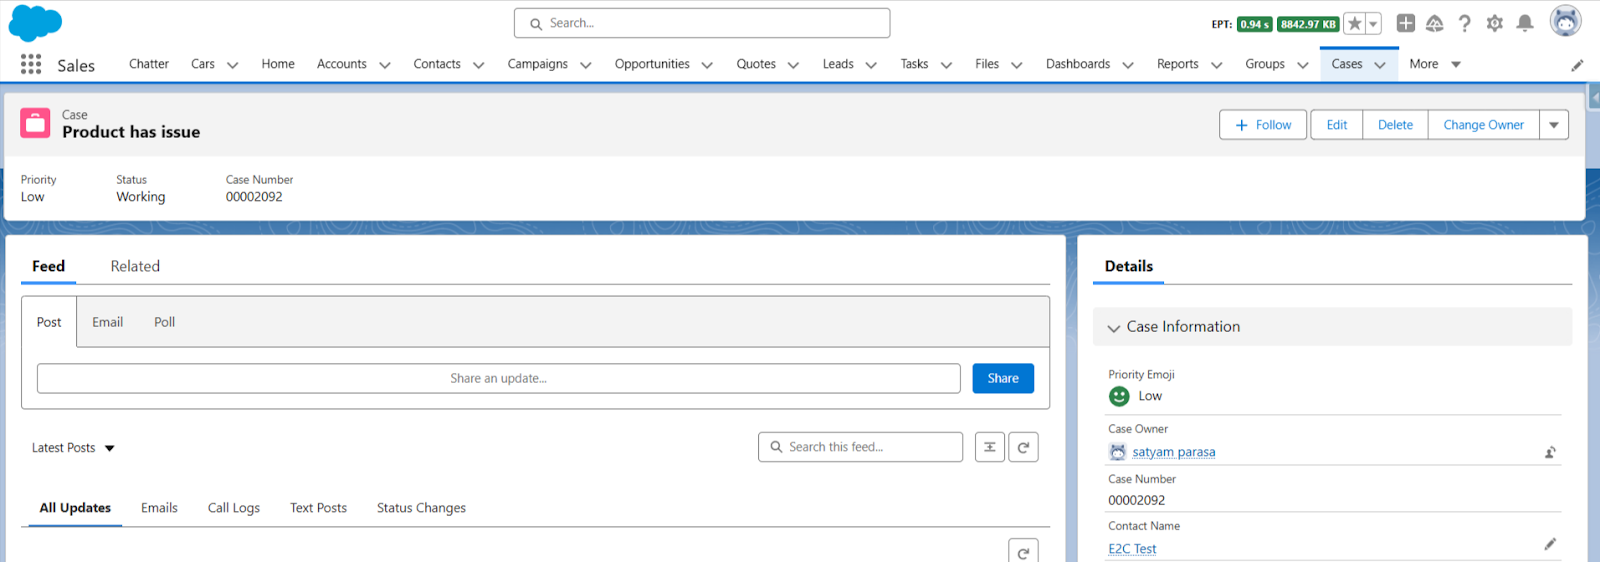
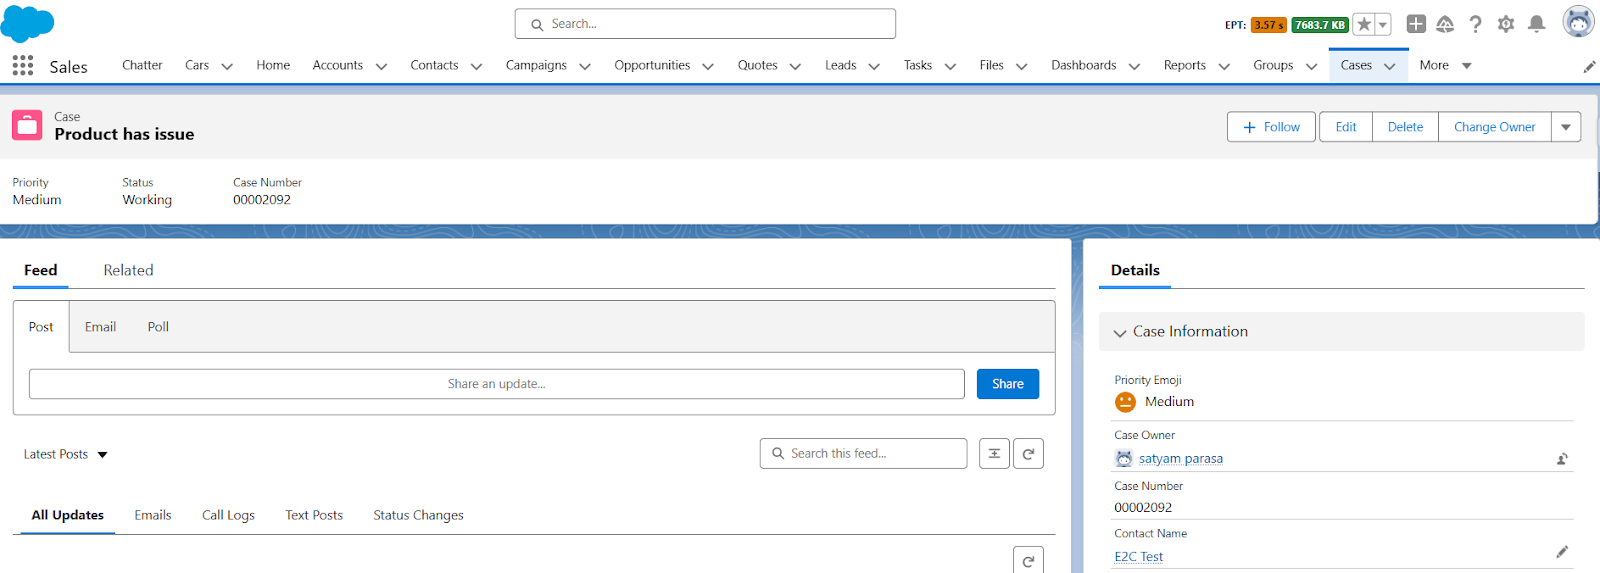
Consider a Priority Emoji field on a Case record page with three possible values: Low, Medium, and High. Without conditional formatting, a user would need to read through the value or rely on their own judgment to understand the priority of the case. However, by applying conditional formatting, you can transform this field into a more intuitive visual tool.
- Low Priority (Green Happy Face): When the field value is “Low,” a green happy face emoji is displayed, immediately signaling to the user that the case has a lower urgency.
- Medium Priority (Orange Neutral Face): If the value is “Medium,” an orange neutral face icon appears, indicating moderate importance.
- High Priority (Red Sad Face): When the value is “High,” a red sad face icon is shown, warning the user that this case needs urgent attention.
This is just one simple example of how conditional formatting can transform your record pages into more actionable, user-friendly environments.
How to Set Up Conditional Field Formatting:
Setting up conditional formatting in Salesforce is straightforward. Here’s how to get started:
1. Open Lightning App Builder: Click on the gear icon in the top right corner and select “Edit Page.” This will redirect you to the Lightning App Builder

2. Select a Field on the Canvas: Once you’ve opened the page layout, select the field you want to apply formatting to.
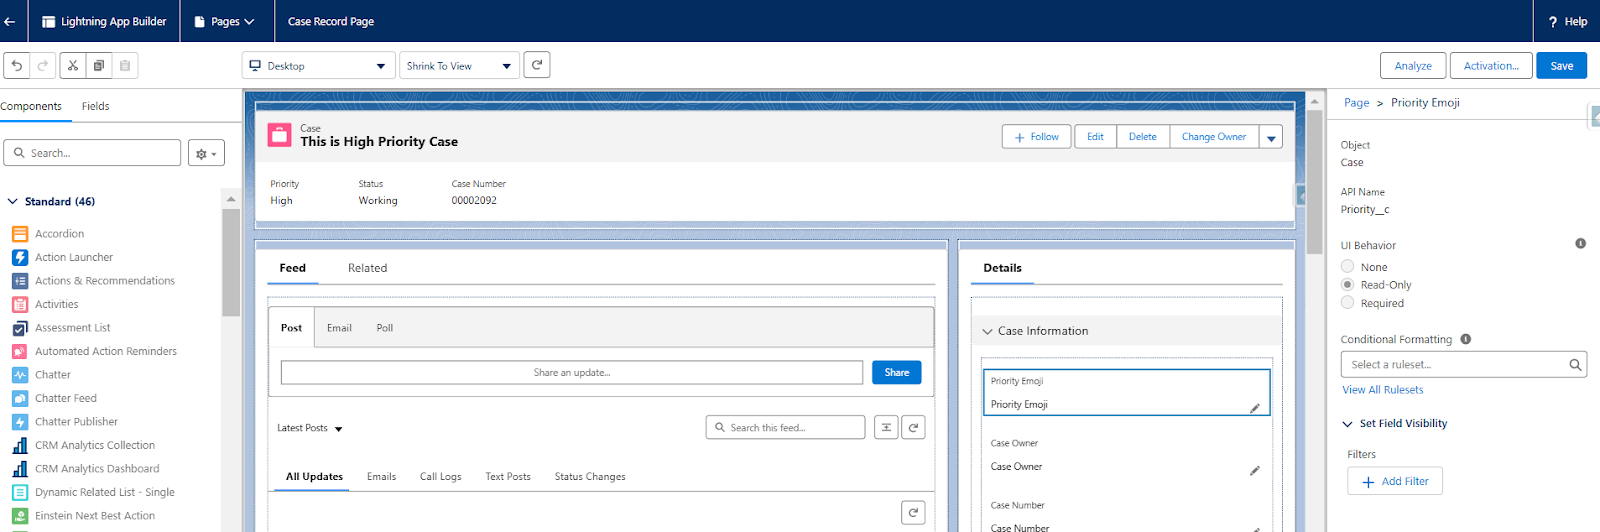
3. Create a new Ruleset: If you click on the selected field, you will see a “Conditional Formatting” lookup field on the right side of the panel. There, you can view the existing rule sets and find the “+ Create Rule Set” option to create a new rule. Provide the rule set name and click “Next.
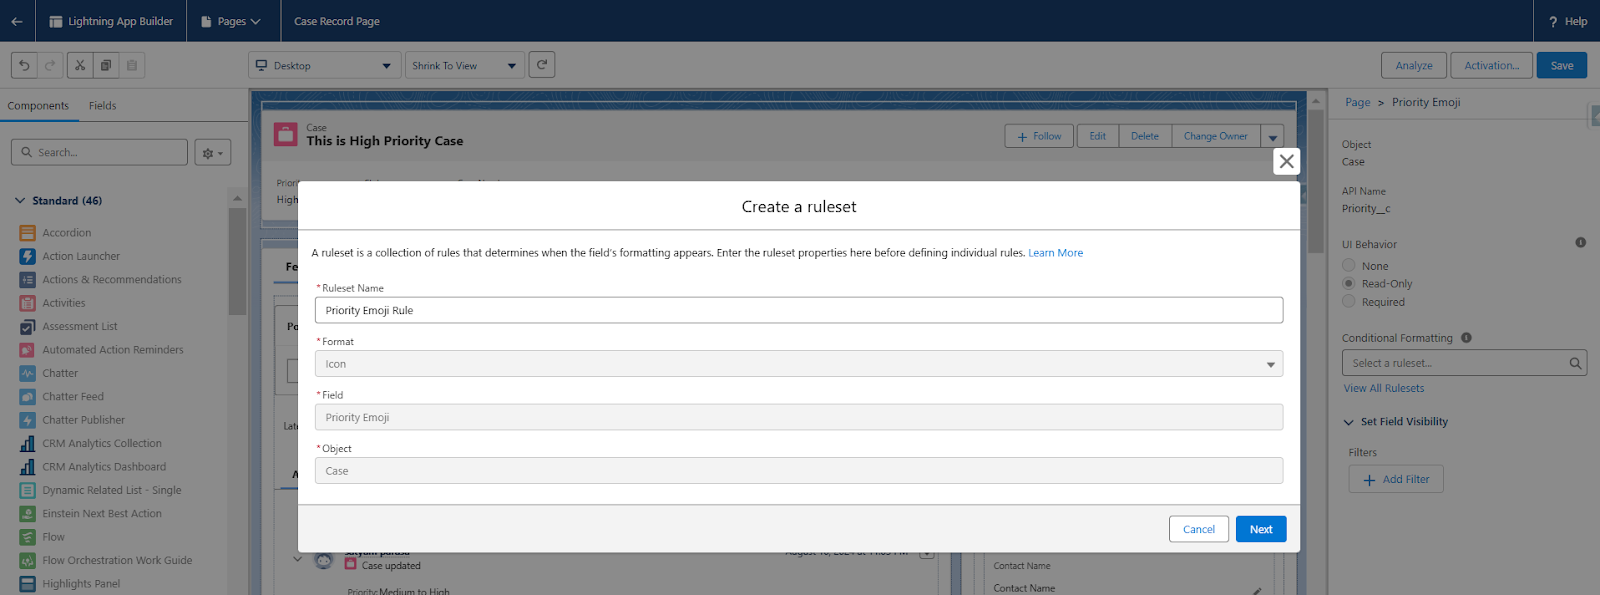
You will be redirected to select an icon, choose a color, set the condition, and then click “Next.”

Add the other rule by clicking the “+ Add Rule” button for the remaining priority values. You can add up to 10 rules in a single rule set. See the example below once all the rules are added.

You can also find the Created Rulesets from the Object Manager.
4. Assign a Ruleset: In the property panel of the field, look for the Conditional Formatting option. You can either select an existing rule set or create a new one as shown in step 3.

5. Save and Review: Once the rules are applied, save the page and preview it to ensure the formatting appears as expected.
View and Manage Rulesets:
Salesforce gives admins full control over their rulesets. You can view, edit, and delete them easily using the new Conditional Field Formatting node in Object Manager. This allows for seamless updates to your rulesets across different objects and pages. For example: Setup → Object Manager → Case → Conditional Field Formatting. You can Edit/Delete from here in future.
Output:
Conclusion
Conditional Field Formatting in Salesforce, introduced in the Winter ’25 Release, offers a powerful and flexible way to enhance the usability of your Dynamic Forms-enabled pages. Whether it’s a simple icon change or more complex formatting rules based on field values, this feature allows admins to give users a better, more intuitive interface to work with. By applying these custom formatting rules, you not only make records easier to understand but also boost productivity by enabling quicker, more accurate decisions.
Start using Conditional Field Formatting in Salesforce today to transform your Salesforce environment into a more dynamic, efficient platform! I hope this Conditional Field Formatting in Salesforce will help you.