There are many tools available in Salesforce for deployment like Change set, ANT migration Tool, Salesforce DX, Workbench, Third part migration tool, and app exchange tool. The ANT migration tool is based on JAVA and used to deploy the Metadata from one organization to another organization. In this post, we will learn how to do Salesforce deployment using the ANT Migration tool.
What Is ANT Migration Tool?
The ANT Migration tool is a command line utility tool to retrieve, deploy and delete metadata from a Salesforce Instance. It helps us to migrate Metadata components such as Apex Classes, Visualforce, SObject and etc components between different Salesforce instances.
Learn about other Development tools and Deployment Process in our old post.
Advantages of using the ANT Migration Tool
ANT migration tool have lots of advantage over Changes set.
- Metadata Backup: Gets the metadata in form of XML files from your Salesforce org and downloads it locally on your computer.
- Delete Component: Change set does not allow you to delete any metadata component from target org. But using ANT migration tool you can delete the components from target org. This can be done using destructiveChanges.xml file.
- Component Support: Some components are not supported to be migrated using change sets but you can migrate them using ANT migration tool.
- Command line Support: It can also be run from command prompt using some specific commands for calling APIs.
Difference between ANT Migration Tool and Change Set
Let’s understand the difference between the change set and the Ant migration tool.
| ANT Migration Tool | Change Set | |
| User Interface | This support a command line interface. Use Ant scripts and Build.xml to specify what elements are to be retrieved/deployed. | This is UI based deployment tool. Which is available in your Salesforce org. Use Setup > Deploy > Outbound / Inbound ChangeSets. |
| Delete Component | With the ANT migration tool, you can delete the components from the target org. | Change set does not allow you to delete any metadata component from target org. |
| Automation | It support Automate deployments by executing scripts in tools like Jenkins and etc tool. | It supports only manually deployed between Sandbox and other Sandbox or production. |
| Dependencies | All dependencies should be manually added | Dependency can be easily added (in single click) |
| Continuous deployment | Suitable for Large teams with Continuous deployment. | Suitable for medium-sized teams using connected orgs |
| Different Org | We can deploy components in unrelated Salesforce org | With Change set we can only deploy component in related org and sandbox only. |
Configuring The Ant Migration Tool
Please follow below step-by-step process to configure ANT Migration Tool:
1. Install the Java
Please use 1.7x or a later version for better security and for TLS security.
2. Download the ANT Tool
First Download ANT from below URL :- https://ant.apache.org/bindownload.cgi
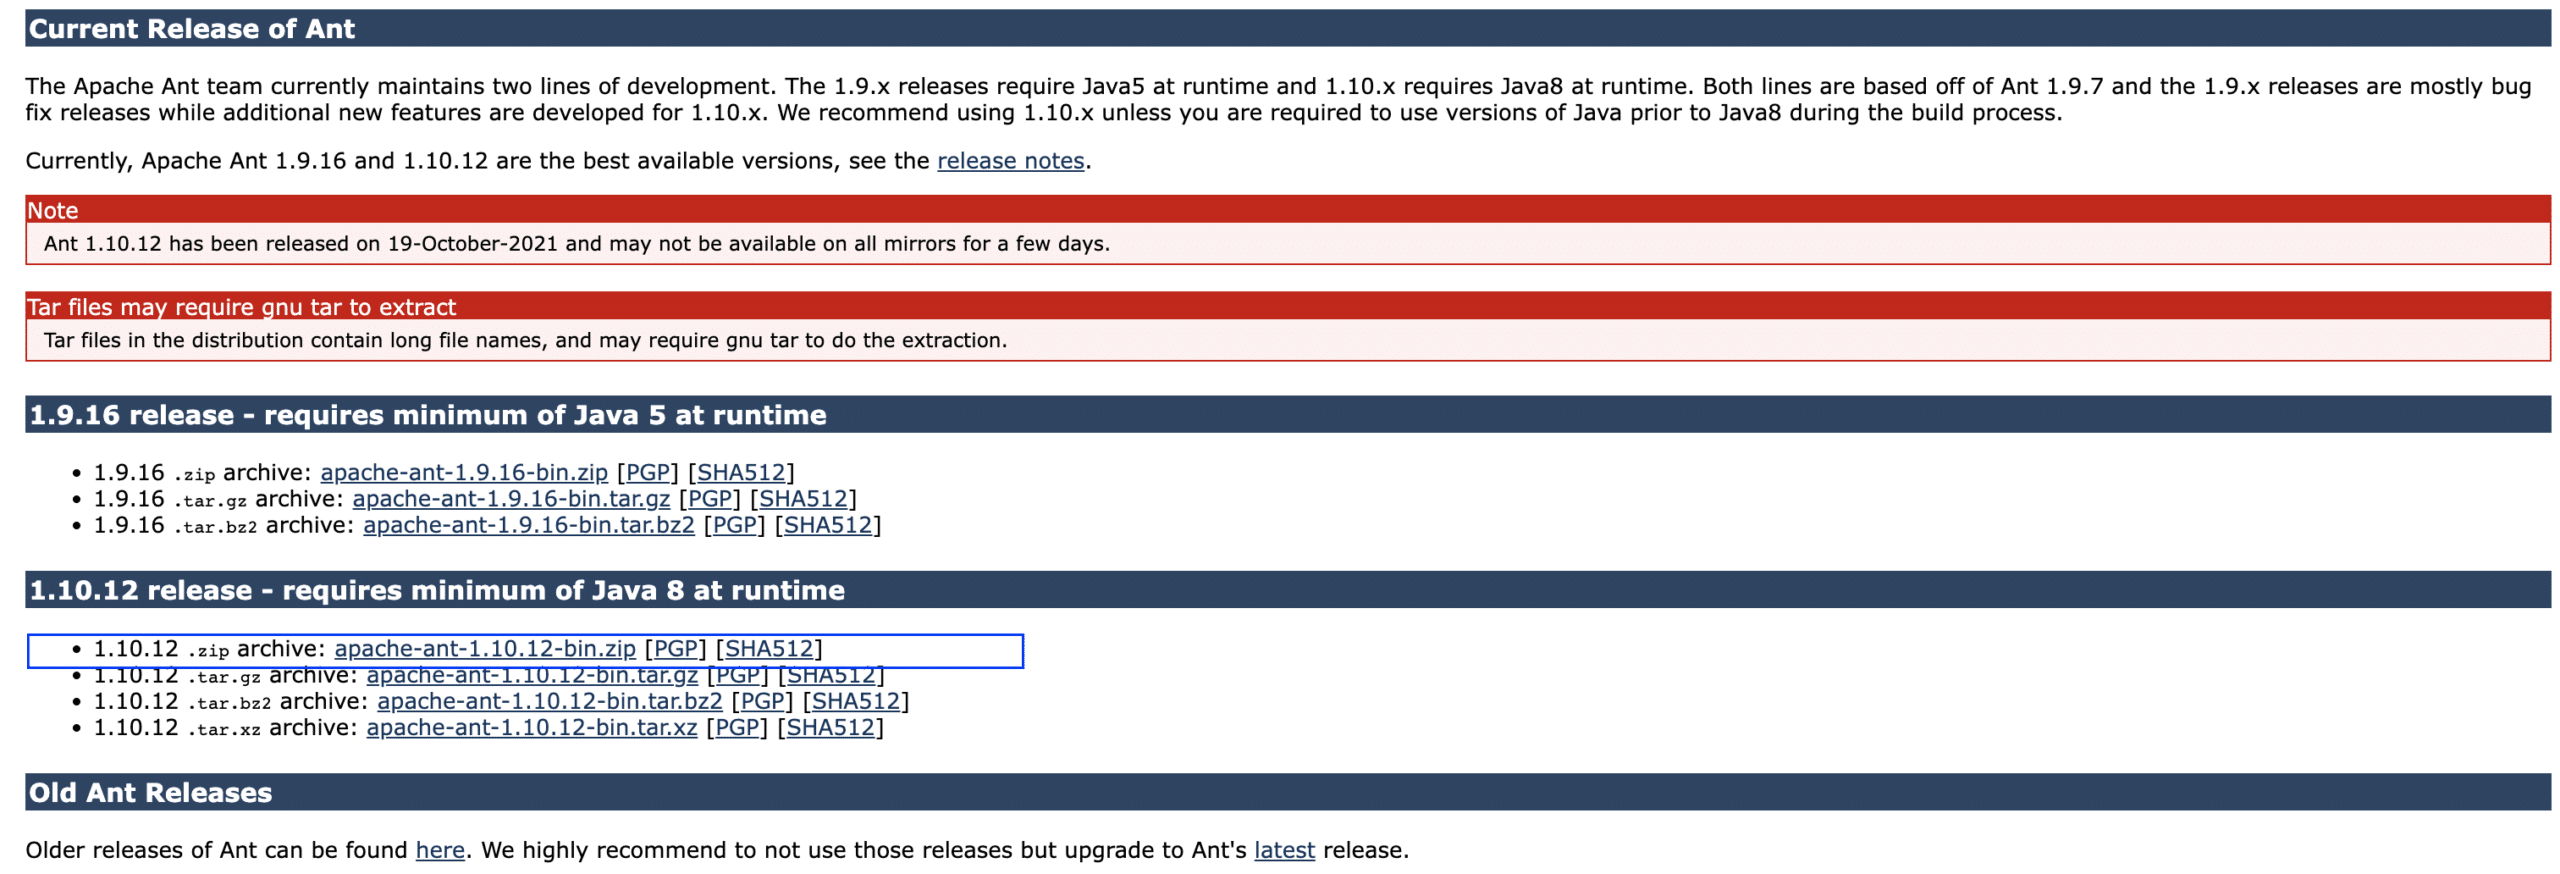
Now We have below two zip files.
Unzip both the files.
3. Installing the Ant Migration Tool
Download the zip file of the Force.com Migration Tool first. You can follow below step to download the ANT Migration tool
- STEP -> Tool -> Force.com Tools and Toolkits
- Then Click on Force.com Migration Tool: and download the JAR file.
Now We have below two zip files
- Ant Tool
- Ant Migration Tool
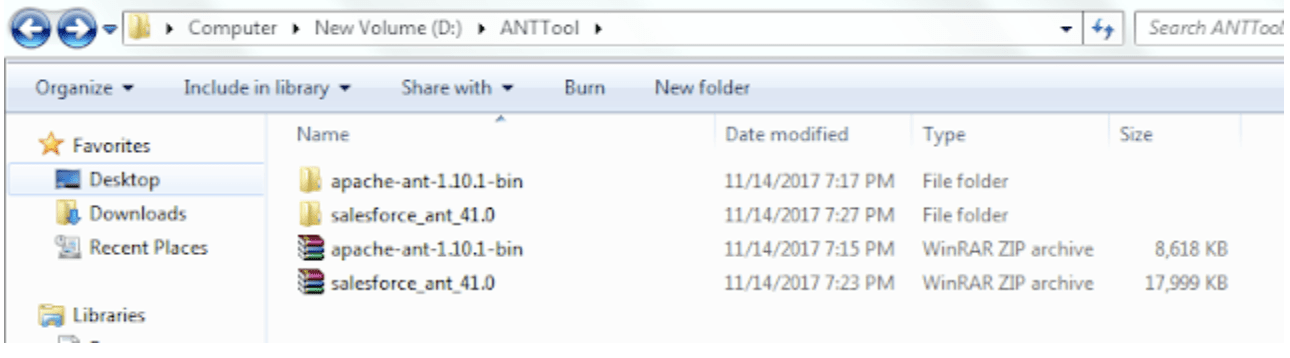
Not it is time to Unzip both files. Now Open Force.com Migration Folder (salesforce_ant_41.0 in my case). and copy “ant-salesforce.zip” File and paste in apache-ant-1.10.1\lib folder “D:\ANTTool\apache-ant-1.10.1-bin\apache-ant-1.10.1\lib” .
4. Set the path
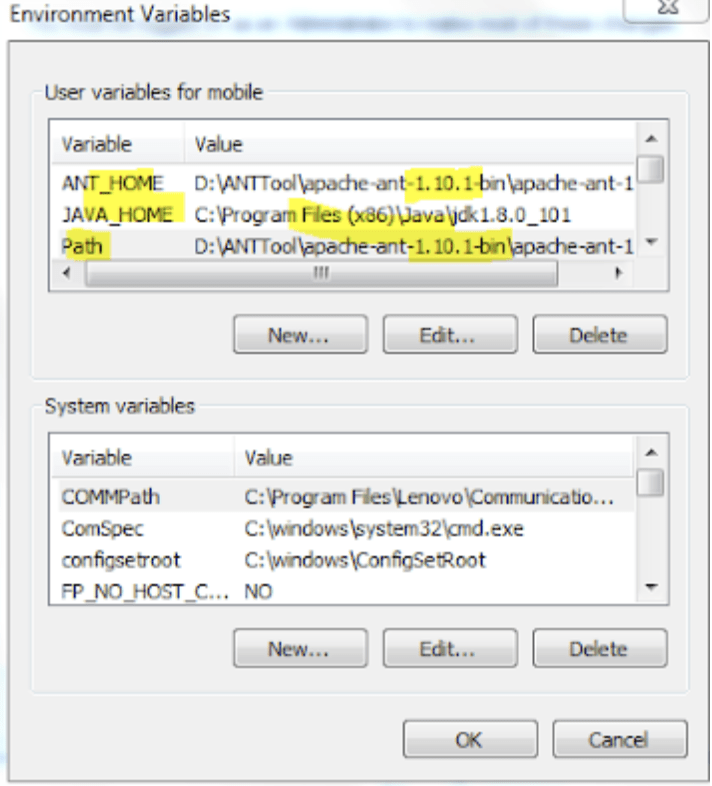
Now we need to set ANT_HOME and JAVA_HOME variable which we can set from Environment variable.
ANT_HOME :- Set the address where you installed the ANT.
JAVA_HOME :- set the value where your JDK is located.
Path :- Set And and Jave path till bin folder
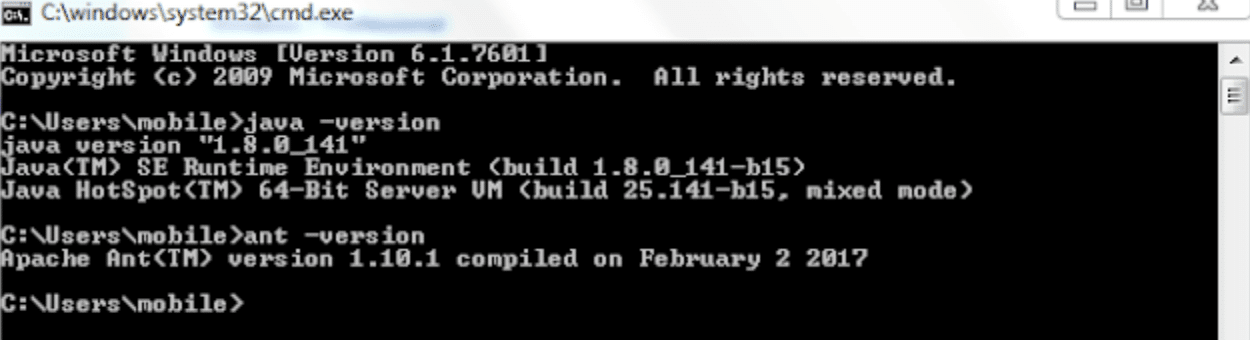
Now, All Set. Check the version
5. Configure the Build.xml File and Build.properties files
To setup connection with salesforce we need to configure the “build.properties“.
- Go to the folder where you unzip the Force.com Migration Tool Files. (in my case salesforce_ant_41.0 )
- Open the “build.properties” and update like below
# build.properties
#

# Specify the login credentials for the desired Salesforce organization
sf.username = amit.salesforce21@gmail.com.demoapp
sf.password = Password

sf.myDevusername = amit.salesforce21@gmail.com.kt
sf.myDevpassword = Password

#sf.sessionId = <Insert your Salesforce session id here.  Use this or username/password above.  Cannot use both>
#sf.pkgName = <Insert comma separated package names to be retrieved>
#sf.zipFile = <Insert path of the zipfile to be retrieved>
#sf.metadataType = <Insert metadata type name for which listMetadata or bulkRetrieve operations are to be performed>

# Use 'https://login.salesforce.com' for production or developer edition (the default if not specified).
# Use 'https://test.salesforce.com for sandbox.
sf.serverurl = https://login.salesforce.com

sf.maxPoll = 20
# If your network requires an HTTP proxy, see http://ant.apache.org/manual/proxy.html for configuration.
#
Now configure “build.xml” to retrievePkg and Deploy
<project name="Sample usage of Salesforce Ant tasks" default="test" basedir="." xmlns:sf="antlib:com.salesforce">

    <property file="build.properties"/>
    <property environment="env"/>

    <!-- Setting default value for username, password and session id properties to empty string
         so unset values are treated as empty. Without this, ant expressions such as ${sf.username}
         will be treated literally.
    -->
    <condition property="sf.username" value=""> <not> <isset property="sf.username"/> </not> </condition>
    <condition property="sf.password" value=""> <not> <isset property="sf.password"/> </not> </condition>
    <condition property="sf.sessionId" value=""> <not> <isset property="sf.sessionId"/> </not> </condition>

    <taskdef resource="com/salesforce/antlib.xml" uri="antlib:com.salesforce">
        <classpath>
            <pathelement location="../ant-salesforce.jar" />
        </classpath>
    </taskdef>

    <!-- Shows deploying code & running tests for code in directory -->
    <target name="deployCode">
      <!-- Upload the contents of the "codepkg" directory, running the tests for just 1 class -->
      <sf:deploy username="${sf.myDevusername}" password="${sf.myDevpassword}" sessionId="${sf.sessionId}" serverurl="${sf.serverurl}" maxPoll="${sf.maxPoll}" deployRoot="codepkg">
       </sf:deploy>
    </target>

    <!-- Shows retrieving code; only succeeds if done after deployCode -->
    <target name="retrieveCode">
      <!-- Retrieve the contents listed in the file codepkg/package.xml into the codepkg directory -->
      <sf:retrieve username="${sf.username}" password="${sf.password}" sessionId="${sf.sessionId}" serverurl="${sf.serverurl}" maxPoll="${sf.maxPoll}" retrieveTarget="codepkg" unpackaged="codepkg/package.xml"/>
    </target>

</project>
6. Create a Package.xml file
Now Setup your Package.xml file
<?xml version="1.0" encoding="UTF-8"?>
<Package xmlns="http://soap.sforce.com/2006/04/metadata">
    <types>
        <members>*</members>
        <name>ApexClass</name>
    </types>
    <types>
        <members>*</members>
        <name>ApexTrigger</name>
    </types>
    <version>41.0</version>
</Package>
Retrieve the code using the Ant Migration Tool
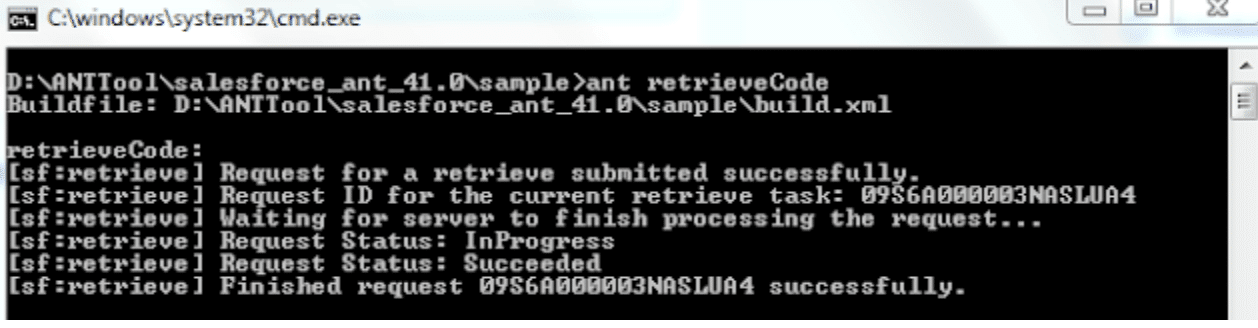
retrieve the Code from Source Salesforce org and execute below command
ant retrieveCode
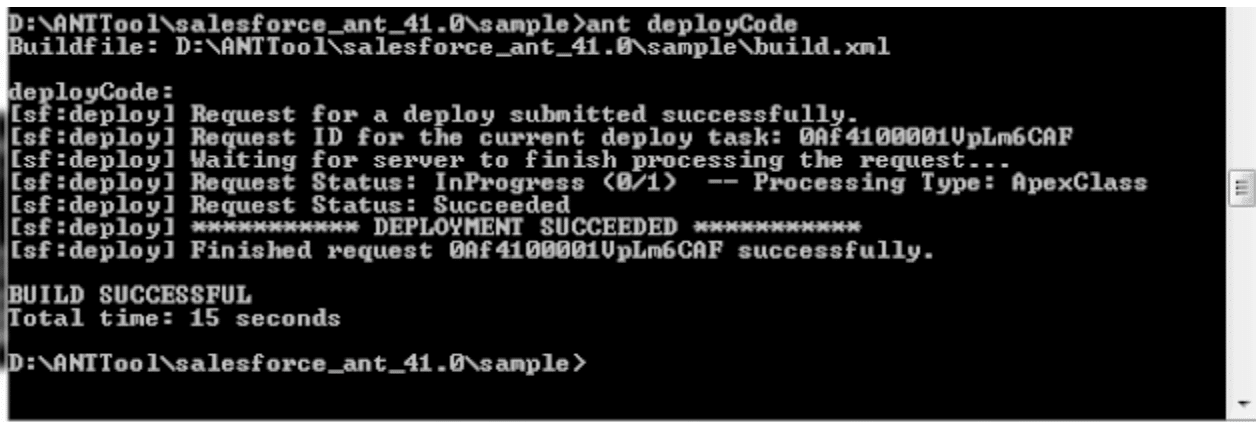
Deploy the code using the Ant Migration Tool
Now Deploy the code to target Salesforce org
ant deployeCode
Deleting Components using the Ant Migration Tool
To delete components, use the same procedure as with deploying components, but also include a delete manifest file that’s named
destructiveChanges.xml and list the components to delete in this manifest. The format of this manifest is the same as
package.xml except that wildcards aren’t supported
The following sample destructiveChanges.xml file names a single custom object to be deleted:
<?xml version="1.0" encoding="UTF-8"?>
<Package xmlns="http://soap.sforce.com/2006/04/metadata">
<types>
<members>MyCustomObject__c</members>
<name>CustomObject</name>
</types>
</Package>
To deploy the destructive changes, you must also have a package.xml file that lists no components to deploy, includes the API
version, and is in the same directory as destructiveChanges.xml:
<?xml version="1.0" encoding="UTF-8"?>
<Package xmlns="http://soap.sforce.com/2006/04/metadata">
<version>54.0</version>
</Package>
What Next?
Salesforce DevOps and DevOps center is future of Salesforce deployment. Learn about Salesforce DevOps Tools here.