
Join us to learn about Salesforce Web Chat ( Formerly called Salesforce live Agent). Salesforce live Web-Chat is a channel that helps connect customers to support agents so they can get the help that they need, where and how they want it. In this video, we will understand how to set up web-chats in our org and can we utilise this wonderful out of the box feature that Salesforce offers us.
What is Salesforce live web chat in?
Salesforce Web-Chat is a channel that helps connect customers to support agents so they can get the help that they need, where and how they want it. It’s made up of a few different parts in Salesforce.
- Chat: the agent part. It gives your support agents the power of conversational messaging right in the console.
- Omni-Channel: the delivery. It gets chat requests to the right agent.
- Embedded Service: the customer part.It provides a chat window that’s optimized for mobile browsers, too, so customers have a great chat experience whether they’re on their desktop or mobile phone.
How to setup Salesforce Live Web Chat?
Follow below step to setup the Salesforce live chat of live agent.
- Setup From Chat Agent Guided Setup Flow
- Grab your code snippet
- Embedded Service Deployment setup
- Configure the Chat Setting like Pre-Chat Page and etc.
- Don’t forget to grab the Deployment Code.
- Create VF page to publish live agent code
- Create Visual force page and add code
- Test Salesforce Live agent
1. Chat Agent Guided Setup Flow
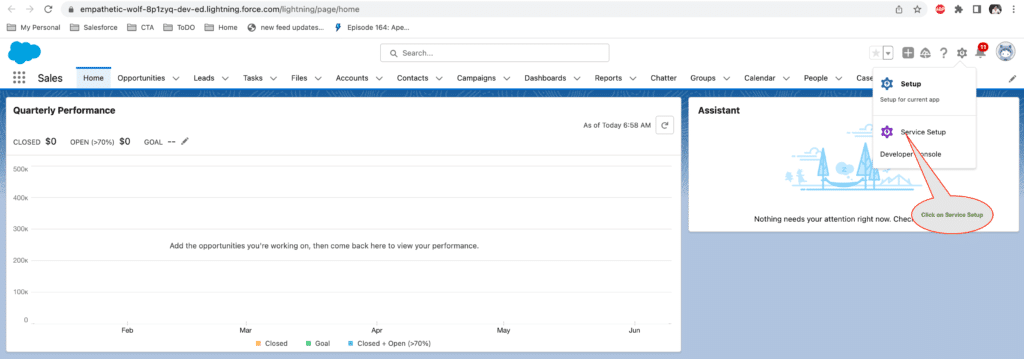
1.1 Click on Service Setup
1.2 Open Chat with customer option.
This will help you to Connect with your customers wherever they are with live, web-based chat. With a click of a button (literally), your customers can get stellar support.
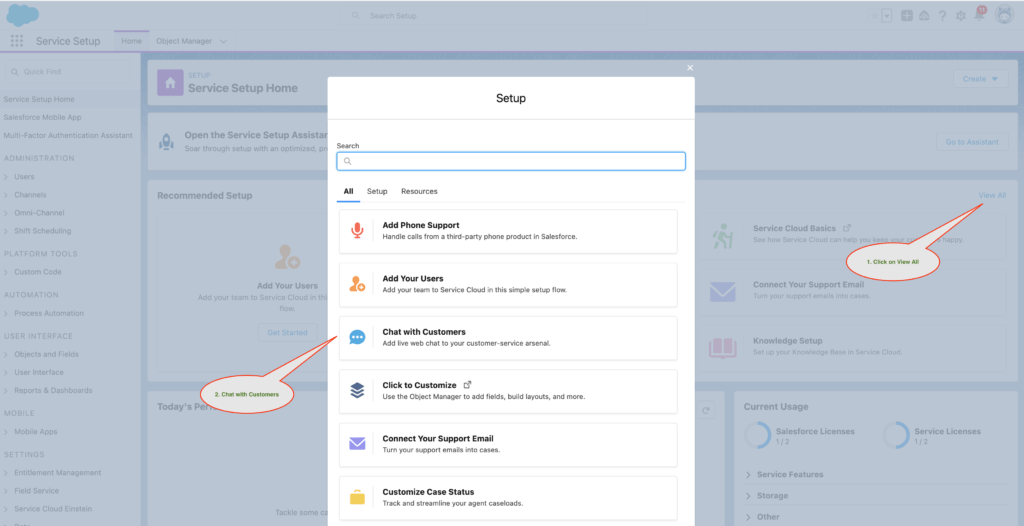
Then click on Start button.
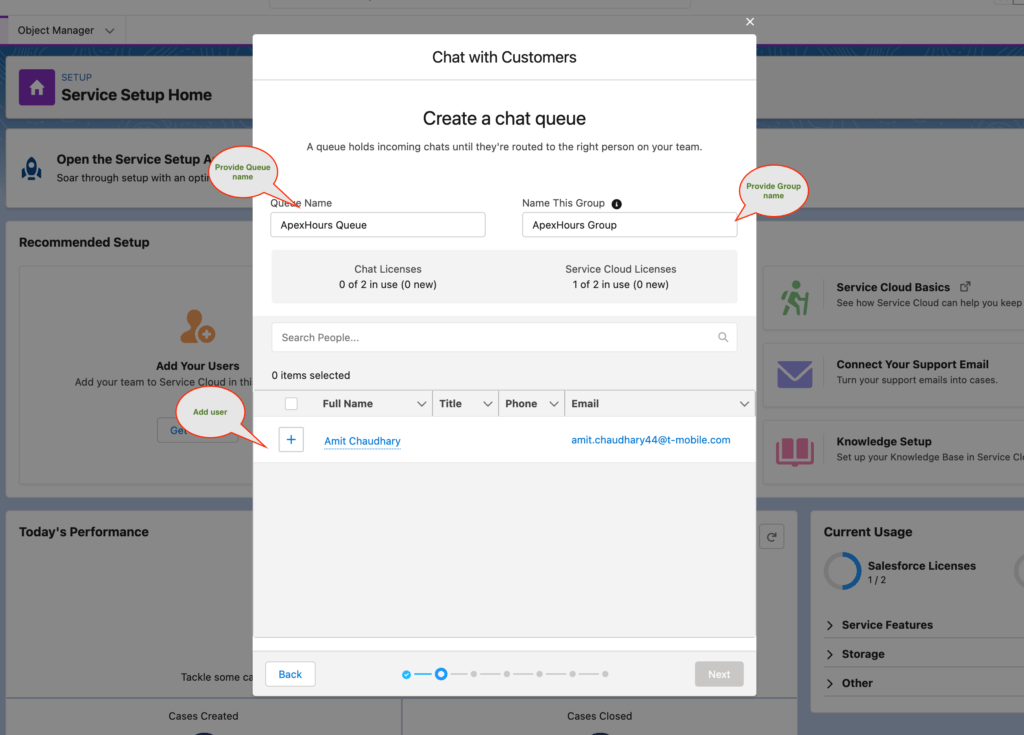
1.3 Create a chat queue
A queue holds incoming chats until they’re routed to the right person on your team.
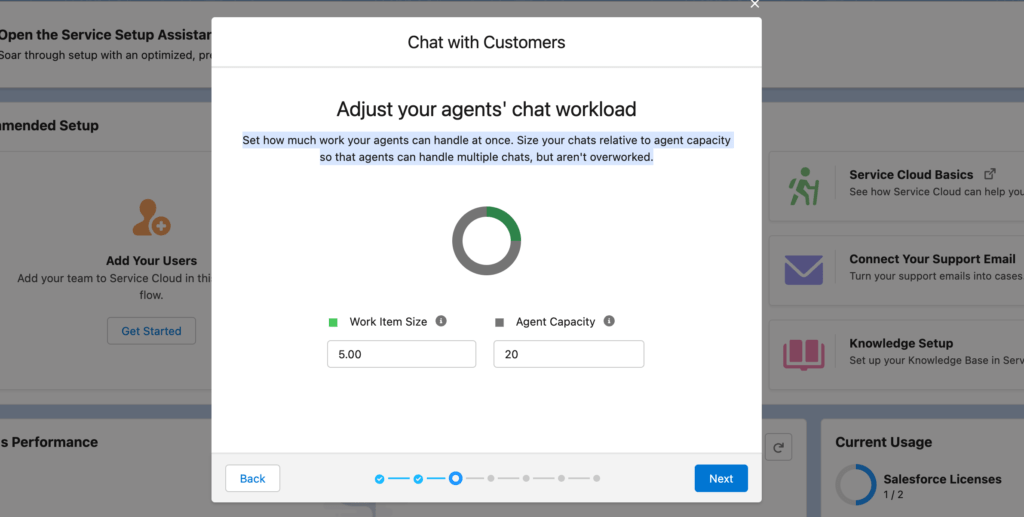
1.4 Adjust your agents’ chat workload
Set how much work your agents can handle at once. Size your chats relative to agent capacity so that agents can handle multiple chats, but aren’t overworked.
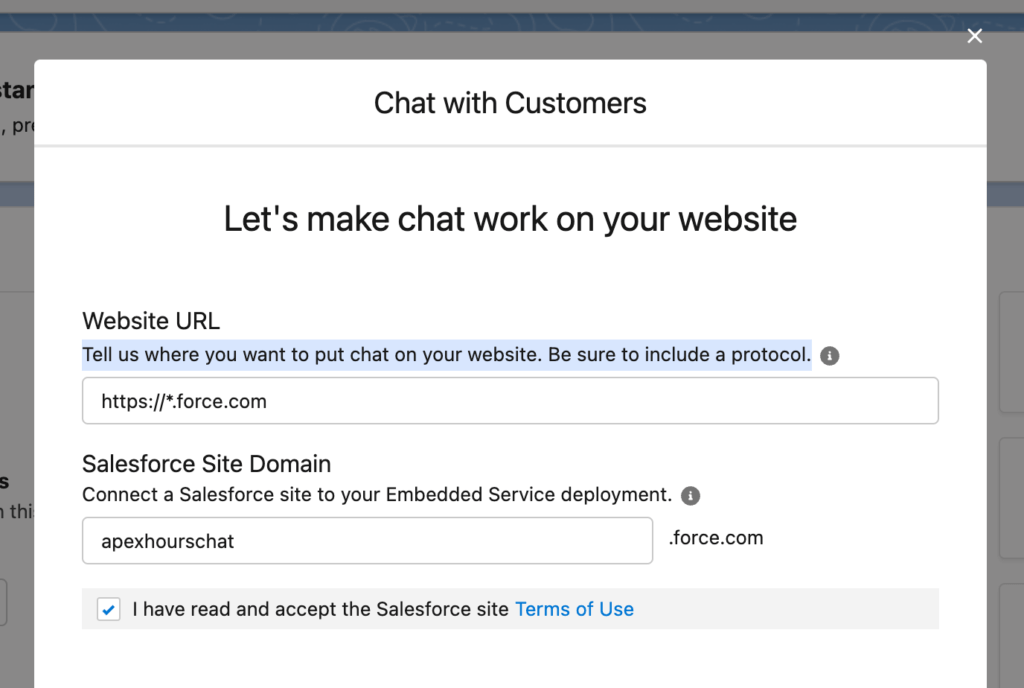
1.5 Let’s make chat work on your website
Tell Salesforce where you want to put chat on your website. Be sure to include a protocol.
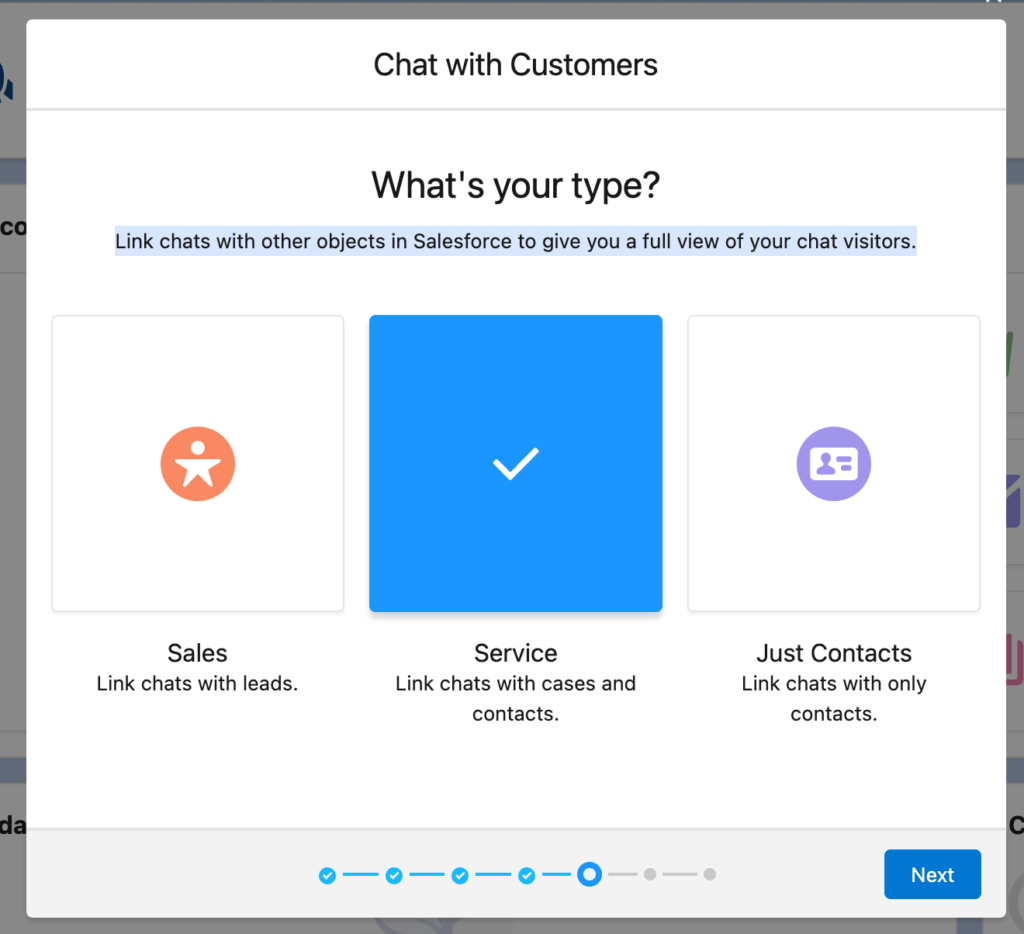
1.6 What’s your type?
Link chats with other objects in Salesforce to give you a full view of your chat visitors.
1.7 Offline Support
If you want to setup the offline support you can setup here.

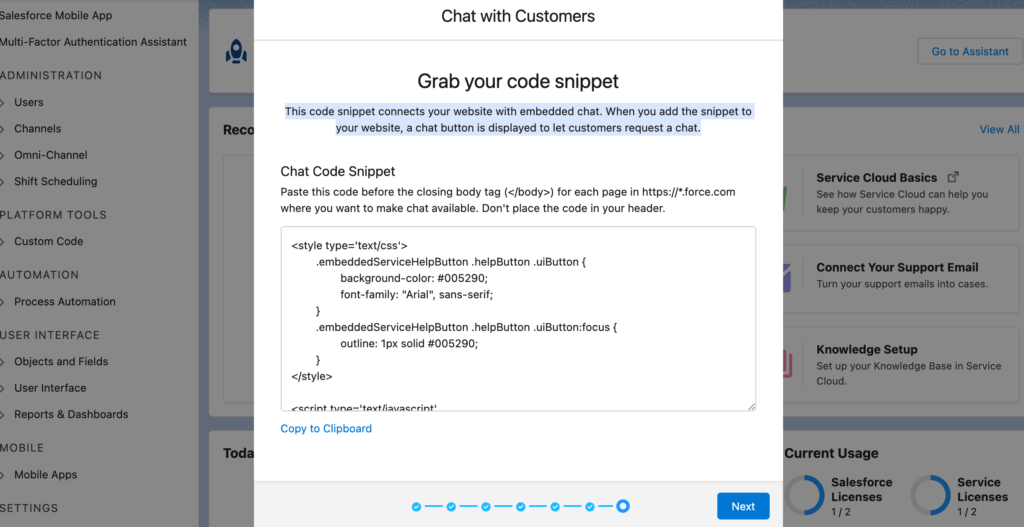
1.8. Grab your code snippet
This code snippet connects your website with embedded chat. When you add the snippet to your website, a chat button is displayed to let customers request a chat. Copy this for future use.
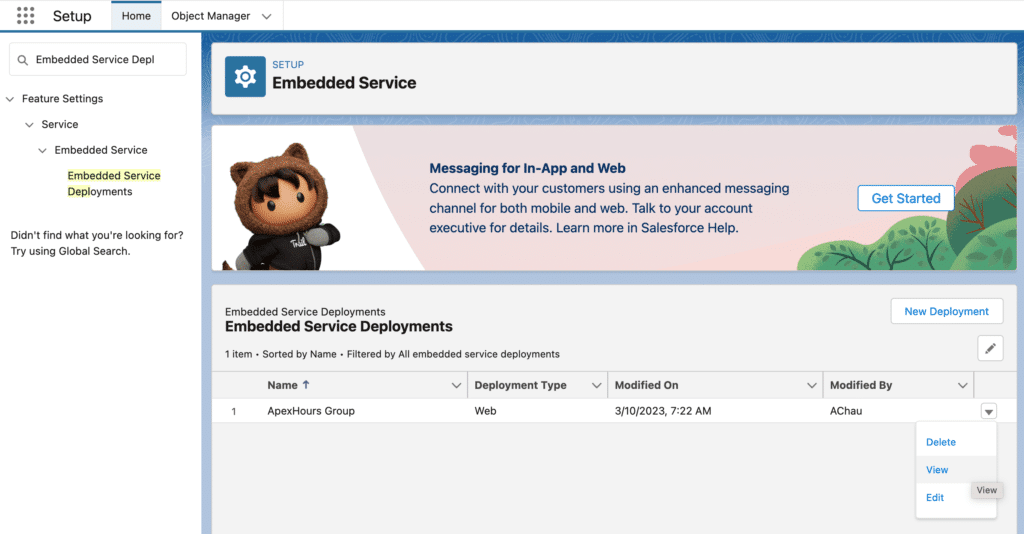
2. Setup Embedded Service Deployment
It time to configure the Embedded Service Deployments. Setup-> Embedded Service Deployments then select your group name.
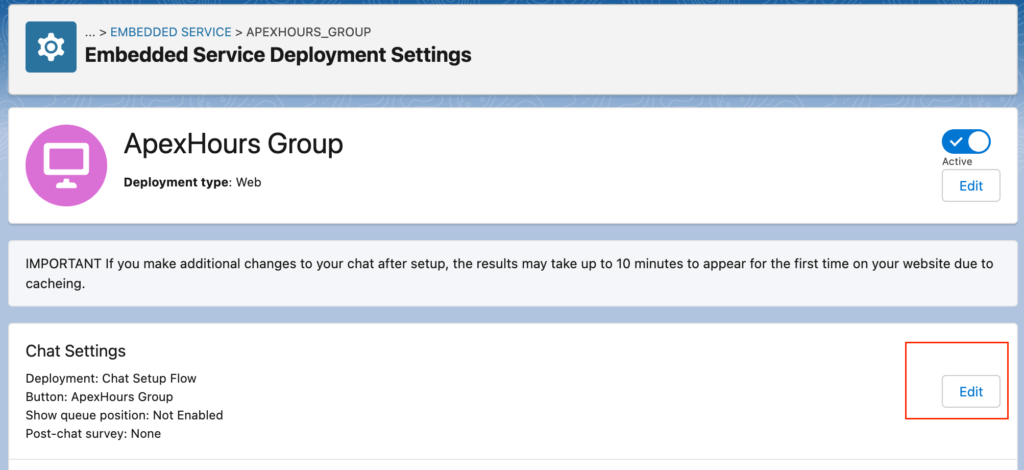
2.1 Configure Chat Setting
Click on Chat setting section edit button
2.1.1 Diable Pre-chat Page
By default Pre-Chat form is enable. disable it. Once done refresh the page.
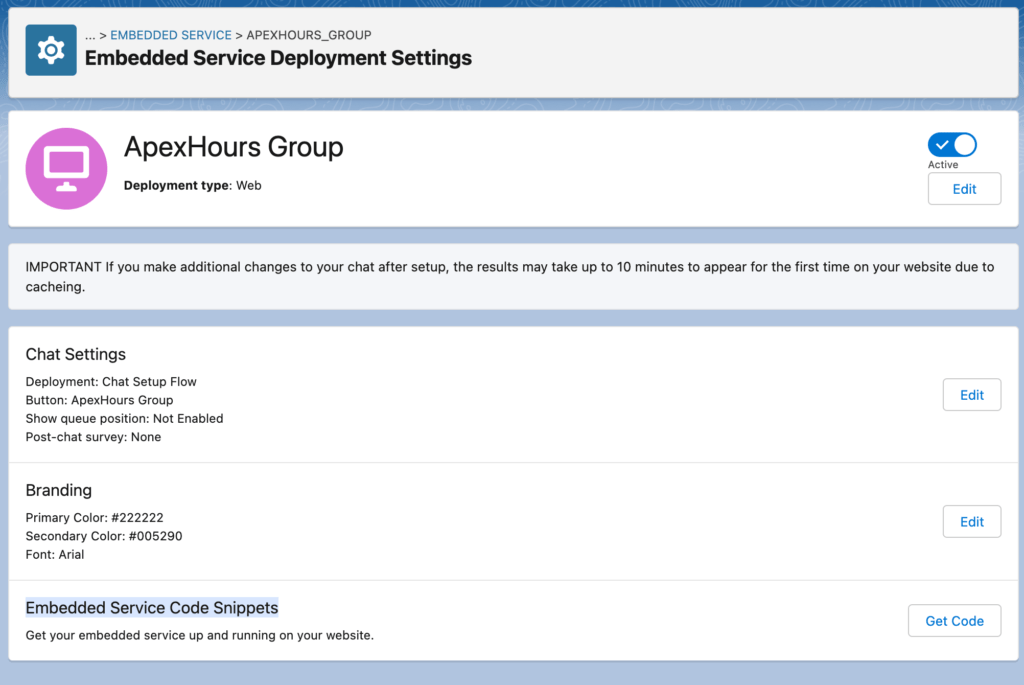
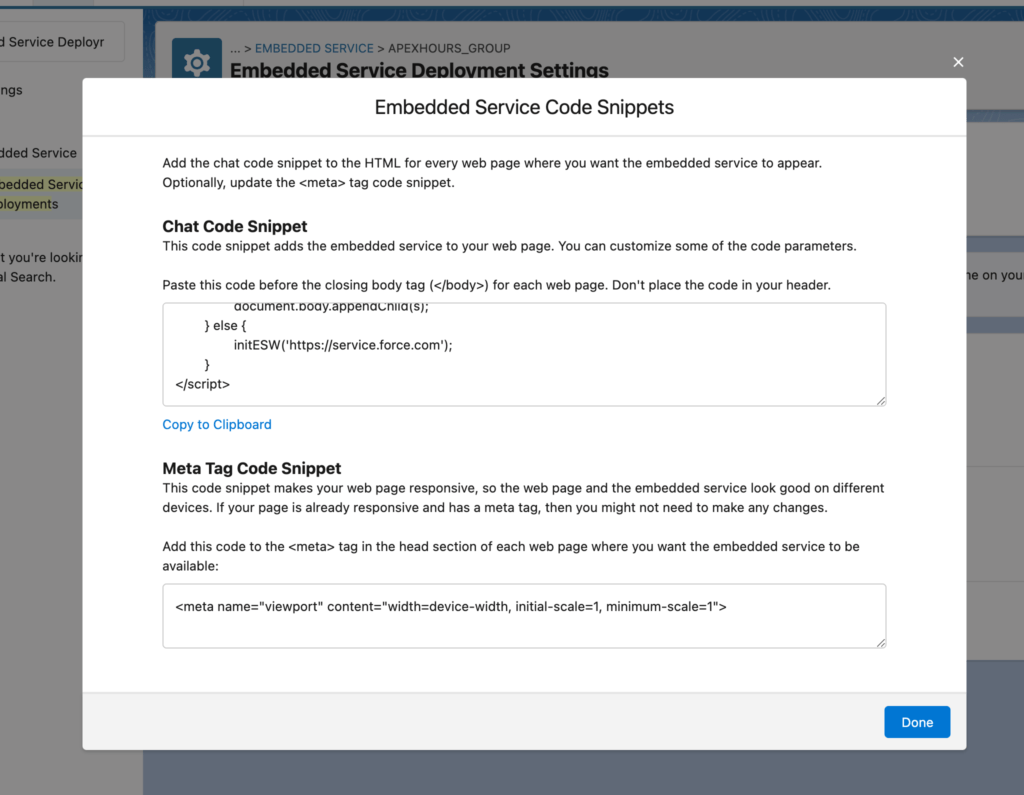
2.2 Get Embedded Service Code Snippets
Go back on “Embedded Service Deployment” and select your group. and click on Get Code button from Embedded Service Code Snippets section.
Copy below code
3. Create VF page
Create a VF page and add code from 2.2 step into VF page between below tage
<apex:page>
// Code from 2.2 step
//
</apex:page>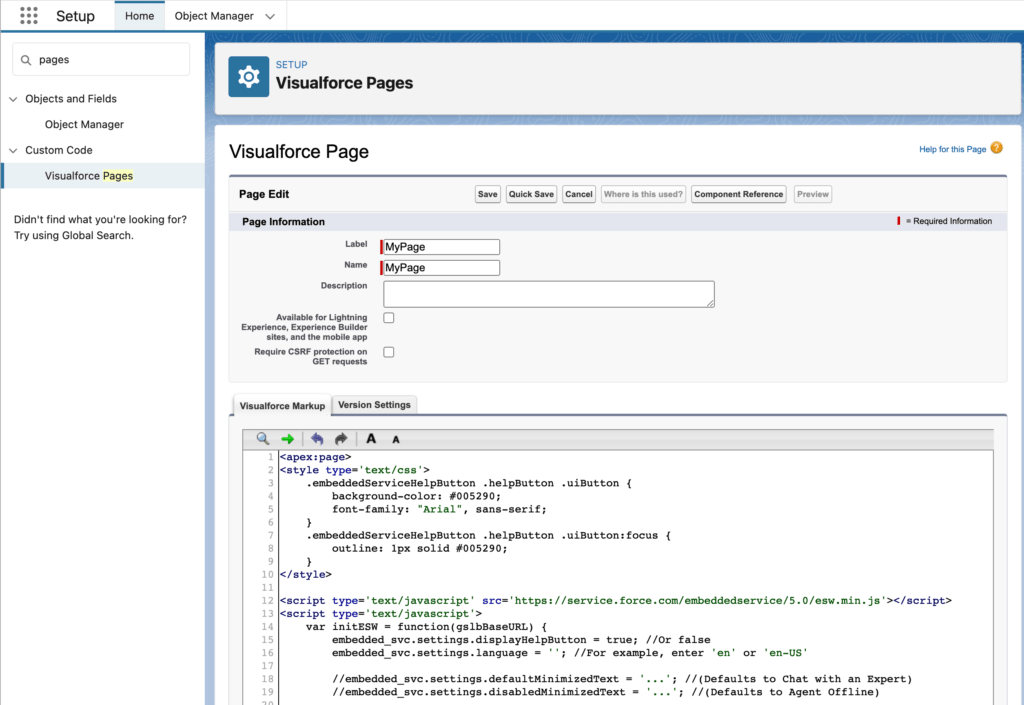
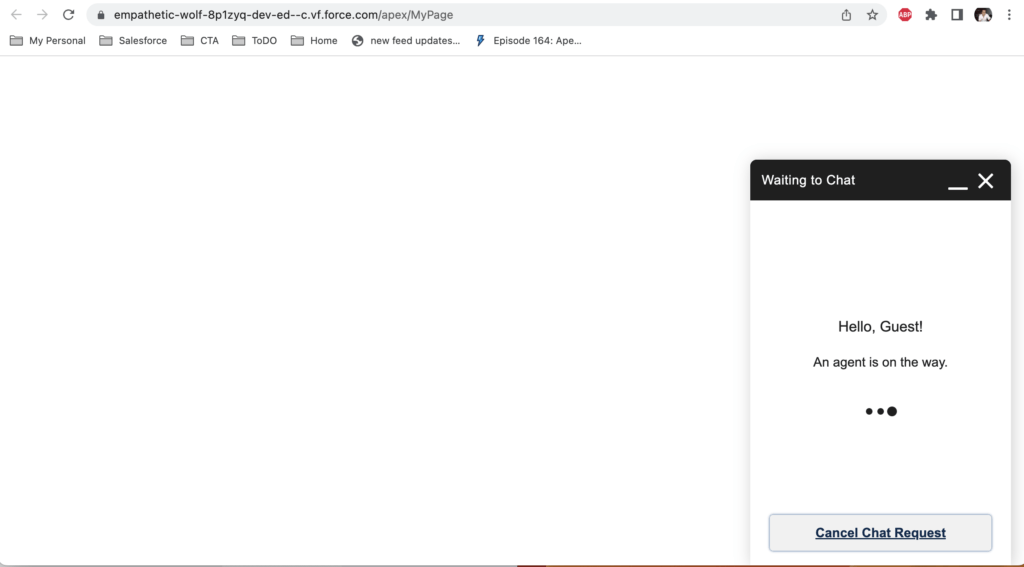
After click on Save button you can use Preview button to see your page. You can see on Agent button but un-clickable. For same you agent need to be online.
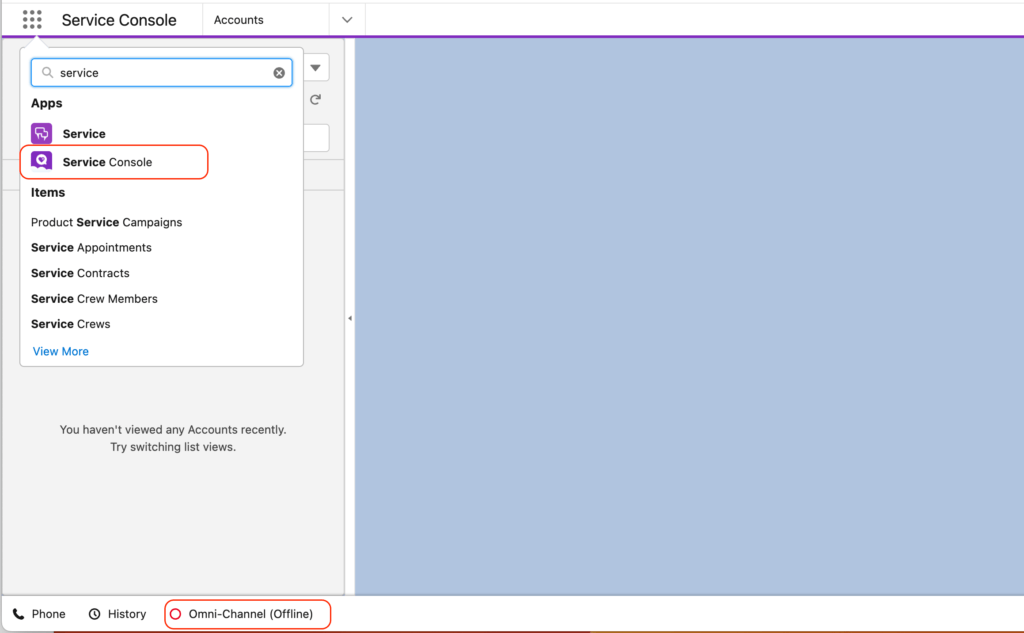
4. Test Salesforce Live Agent
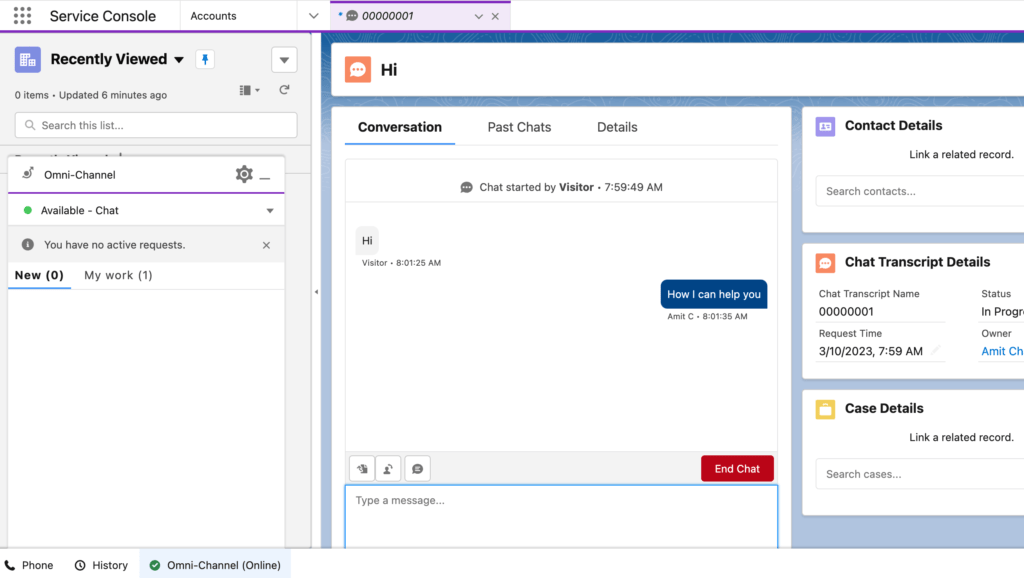
Open Service console from App Launcher. Then go online from “Omni-Channel” option.
Click on Omni-Channel then click on Available Chat Option
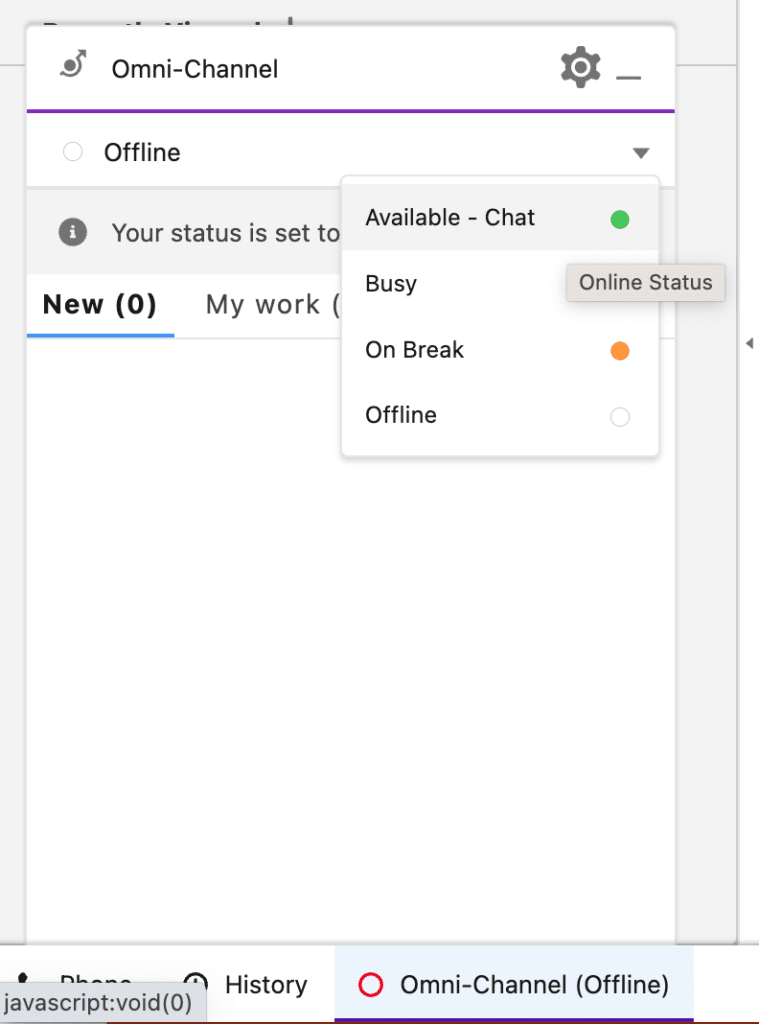
Once agent is online Refresh your VF page and click on Chat with Agent button
Once agent will accept request from Omni-Channel they can chat agent.
What next in Salesforce Chat
Till this point you see how we can setup Live agent in Salesforce. As a next setup you can configure the “Brand Chat Widget” and configure the PRe-Char form and enable Offline Form submit. Check below video to learn about this step.
Step by step guide to configure Salesforce chat?
Advantages of Live Web-Chat
- Connect agents for higher productivity.
- Build a smarter team.
- Get personalized , real-time help online or in your apps.
- Improves the support experience for customers.
- Provides 24/7 support.
- Increases customer engagement.
Please check this post for our old and upcoming session on Service Cloud. Here is playlist of our service cloud sessions recording.
Summary
Salesforce live Agent is now renamed as Salesforce Live Chat / Live Web Chat this allow customer to communicate with Sales rep to get instance response on query or questions.
exciting crisp and to the point session. Kudos to the Apexhours Team for being best.
Thanks Khyati and Amit team for the interesting topic which is easy to understand now.
Very nice presentation
Thanks for the Session
Thanks Kyati and Amith for another Thrilling session.
very interesting session. Thank You khyati and Amit.
Glad you like out An Introduction to Salesforce Chat (Live Agent) session
Nice Explanation and Interesting session.
Thank You Khyati and Amit Bhaiya.
I Have One Query in Pre-chat we are using Some Fields for Collecting Information in Backend if any Validation Rules are active to validate data like (Eg : Phone number must should be 10 Digit) it effect to the Pre-chat or not?
Thank You Khyati and Amit .Very well demo and explanation .Completed session
Thank you for the easy understanding lessons.
Thank You Khyati and Amit for demo and wonderful session on web chats
Very well explained. Nice session and contents. Thank you so much Khyati and Amit.
Glad you like our Salesforce Web Chat ( Formerly called Salesforce live Agent) session.
What salesforce license is required to enable the Web live chat?
Have you found the answer?
Can this work for Portal users?
I hope this video will help to setup Salesforce live agent step by step
Hello really good session but issue i am facing while setting up this thing related CORS….
Access to XMLHttpRequest at ‘https://ep1690991272890.my.site.com/b2b2c/embeddedService/sidebarApp.app?aura.format=JSON&aura.formatAdapter=LIGHTNING_OUT&guestUserLang=en-US&eswConfigDeveloperName=Chat_Team’ from origin ‘https://ep1690991272890.my.salesforce.com’ has been blocked by CORS policy: No ‘Access-Control-Allow-Origin’ header is present on the requested resource.
lightning.out.delegate.js?v=1691753490695:151 GET https://ep1690991272890.my.site.com/b2b2c/embeddedService/sidebarApp.app?aura.format=JSON&aura.formatAdapter=LIGHTNING_OUT&guestUserLang=en-US&eswConfigDeveloperName=Chat_Team net::ERR_FAILED 503
can you please help me to resolve this issue, this is occurring when i am clicking on “Chat with Agent button”.
Thanks
followed everything same but whenever omnichannel is available the vfpage is not loading can you please help me on this
I have tried this as it is, But in visual force view, chat is not in online so I have added the chat in the expereince cloud direclty still it is in the offline mode only and it is coming to online.