This blog will give you key insights into how a Salesforce expert can utilize Git effectively. In today’s world, version controlling your code has become more important than ever—because you never know when a piece of your past code might turn out to be useful in the future.
Let’s take a real example. Imagine you’re in a client meeting, carefully listening to the requirements. You walk away confident that you understood everything. But when you deliver the functionality, the client says, “This isn’t what I wanted.” A small miscommunication has cost you valuable time and effort.
Now let’s fast forward—after a few months (or maybe even years), the same client comes back and says, “I need that exact functionality you had shown me earlier.” What would you do?
Some people might say, “We’ll keep backups of all the code.” But the real question is: Where will you store those backups, and how will you manage them efficiently? Someone unfamiliar with version control might think of saving different versions in Notepad files, piling them up in folders. But let’s be honest—does that sound practical? Not at all.
This is exactly where version control tools like GitHub and Bitbucket come into play. These platforms are open-source, cloud-based, and accessible from anywhere—no need to clutter your local system. Think of them like Google Drive: just as you store important documents online to access them anytime, Git allows you to store and manage your code versions securely, collaborate with others, and roll back changes whenever needed.
Sounds amazing, right? That’s what this blog is all about—helping you, as a Salesforce expert, understand version control with Git so you can work smarter, save time, and avoid those “lost code” nightmares.
A Little Bit About Version Control
Version control simply means keeping track of every change made to a file or project over time. Every past version is stored, so you can always review it, compare it, or even roll back to it whenever needed.
Let’s simplify this with an example. Imagine you create a simple text file that says:
Hello World
You save it as “Hello World file”. Later, you make a change:
Hello New World
Now, instead of overwriting the old file, you save it as “Hello World file v2” or “Hello World file (2)”. If you continue this way, you’ll end up with multiple versions of the same file cluttering your system.
That’s manual version control—and as you can guess, it quickly becomes messy and inefficient.
This is where tools like GitHub and Bitbucket come in. They act as automated version control systems, storing every change you make, along with details like who made the change, when, and why. Think of GitHub as the Google Drive for your code—just like you use Google Drive for documents, Google Photos for pictures, or Google Calendar for events, GitHub stores your code safely in the cloud, making it accessible anytime, anywhere.
In this blog, we’ll focus mainly on GitHub, since it is the most popular and widely used version control platform among developers—including Salesforce experts.
A Little Bit More About Git and GitHub
When you write commands to push your code, those commands are part of Git. Git is the version control system that manages your code changes.
GitHub, on the other hand, is a platform that stores your code repositories. It acts like a cloud hub for all your projects.
One of the best features of GitHub is that it can be connected with many developer tools, like VS Code and others, making the development process smoother. Because GitHub is widely used and accepted by developers worldwide, it has become one of the most popular platforms for managing and collaborating on code.
How to Push Your Salesforce Code to GitHub
Once you’re done working with your code in Salesforce, the next step is to push it to GitHub so it’s safely stored and version-controlled.
Before we begin, I’ll assume you already know the basic steps like “Create Project With Manifest” and authorizing your Salesforce org. Let’s skip that part and directly focus on storing the code in GitHub.
- Create (or log in to) your GitHub account
- If you don’t have an account yet, create one by following the official GitHub guide: Creating an account on GitHub
- If you already have an account, just log in.
- Create a new repository
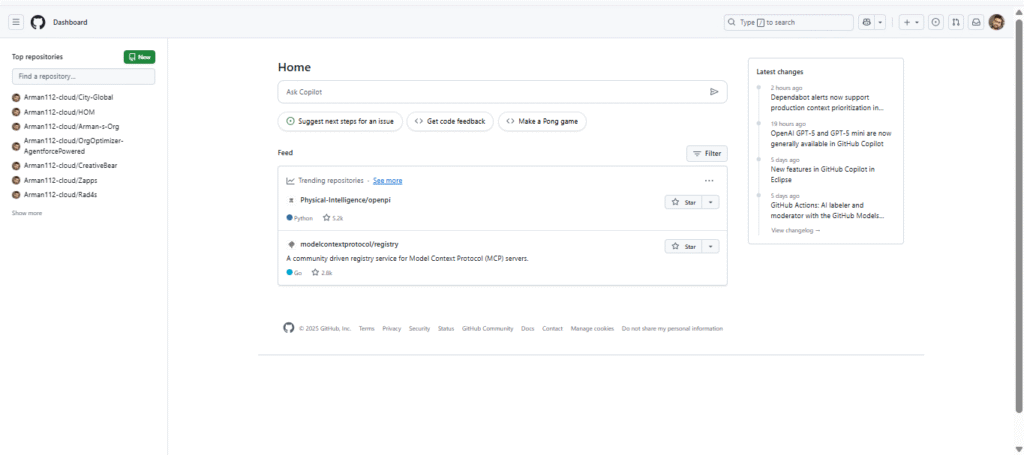
- After logging in, go to the GitHub Home Page.
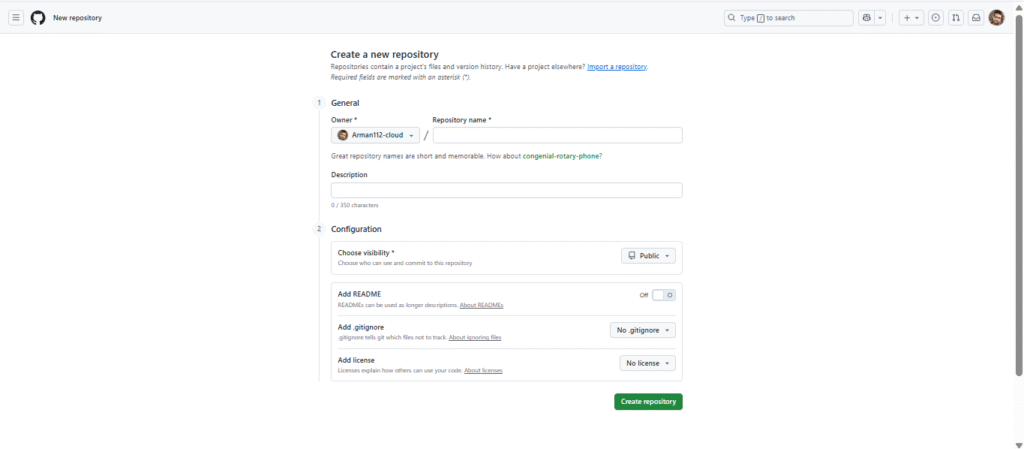
- Click the green “New” button to create a new repository.
- Enter a Project Name (this will be your repo name).
- Optionally, add a short Description about your project.
- Click “Create Repository.”
That’s it—you’ve set up your space on GitHub where all your Salesforce code will live. In the next step, we’ll connect this repository with your local project and actually push the code.
I’ve already created a new repository named “Repo-For-Apex-Hour” on GitHub. Now, let’s connect our local Salesforce project from VS Code to this repository.
- Open VS Code and go to the Terminal.
- Run the following commands one by one:
git init
git add README.md
git commit -m "first commit"
git branch -M main
git remote add origin https://github.com/Arman112-cloud/Repo-For-Apex-Hour.git
git push -u origin main
Here’s what these commands do:
- git init → Initializes Git in your local project.
- git add README.md → Stages your README file (you can also use git add . to add all files).
- git commit -m “first commit” → Saves your staged files with a commit message.
- git branch -M main → Sets your main branch as main.
- git remote add origin … → Links your local repo with the GitHub repository.
- git push -u origin main → Pushes your code to GitHub.
- Now, go back to your GitHub repository page and refresh it.
✨ Surprise! You’ll see your entire project structure on GitHub, just like in VS Code. You can browse and access files directly from the GitHub web interface.
Now lets check how you can track all your previous files. Just go to force-app/main/default/classes/FileUploaderClass.cls just for an example just click on to the “History” of that particular file this button is located just below the three dot on top right corner.
Learn more about Useful Git commands every developer should know.
Important Git Commands Reference
Here’s a comprehensive table of essential Git commands with their purposes:
Repository Initialization & Setup
| Command | Purpose |
| git init | Initialize a new Git repository in the current directory |
| git clone <url> | Create a local copy of a remote repository |
| git config –global user.name “name” | Set your username globally |
| git config –global user.email “email” | Set your email address globally |
| git config –global –list | View global configuration settings |
Basic File Operations
| Command | Purpose |
| git status | Check the status of files in working directory and staging area |
| git add <file> | Add specific file to staging area |
| git add . | Add all changed files to staging area |
| git add -A | Add all new and changed files to staging area |
| git commit -m “message” | Create a commit with a descriptive message |
| git commit -a -m “message” | Stage and commit all tracked files in one command |
| git commit –amend | Modify the last commit |
Branch Management
| Command | Purpose |
| git branch | List all local branches (asterisk shows current branch) |
| git branch -a | List all branches (local and remote) |
| git branch <name> | Create a new branch |
| git branch -d <name> | Delete a branch (safe delete) |
| git branch -D <name> | Force delete a branch |
| git branch -m <old> <new> | Rename a branch |
| git checkout <branch> | Switch to an existing branch |
| git checkout -b <name> | Create and switch to a new branch |
| git checkout – | Switch to the previously checked out branch |
| git merge <branch> | Merge specified branch into current branch |
Remote Repository Operations
| Command | Purpose |
| git remote | List configured remote repositories |
| git remote -v | List remotes with their URLs |
| git remote add <name> <url> | Add a new remote repository |
| git remote remove <name> | Remove a remote repository |
| git remote rename <old> <new> | Rename a remote repository |
| git remote show <name> | Show detailed information about a remote |
| git push origin <branch> | Push local commits to remote repository |
| git push -u origin <branch> | Push and set upstream tracking for new branch |
| git push –tags | Push all tags to remote repository |
| git pull | Fetch and merge changes from remote repository |
| git pull origin <branch> | Pull changes from specific remote branch |
| git fetch | Download changes from remote without merging |
Viewing History & Changes
| Command | Purpose |
| git log | View commit history |
| git log –oneline | View compact commit history (one line per commit) |
| git log –summary | View detailed commit history |
| git log -p | Show commit history with changes |
| git diff | Show unstaged changes in working directory |
| git diff –staged | Show staged changes |
| git diff <branch1> <branch2> | Compare changes between branches |
| git blame <file> | Show who changed each line in a file |
Undoing Changes
| Command | Purpose |
| git reset HEAD <file> | Unstage a file while keeping changes |
| git reset –soft <commit> | Reset to commit, keep changes staged |
| git reset –mixed <commit> | Reset to commit, unstage changes (default) |
| git reset –hard <commit> | Reset to commit and discard all changes |
| git checkout — <file> | Discard changes to a specific file |
| git revert <commit> | Create new commit that undoes specified commit |
| git clean -f | Remove untracked files from working directory |
Stashing
| Command | Purpose |
| git stash | Temporarily save uncommitted changes |
| git stash pop | Apply most recent stashed changes |
| git stash list | Show all stashed changes |
| git stash clear | Remove all stashed entries |
| git stash drop | Delete a specific stash |
Tagging
| Command | Purpose |
| git tag | List all tags |
| git tag <name> | Create lightweight tag at current commit |
| git tag -a <name> -m “message” | Create annotated tag with message |
| git tag <name> <commit> | Tag a specific commit |
| git tag -d <name> | Delete a local tag |
| git push origin <tag> | Push specific tag to remote |
| git push origin –delete <tag> | Delete tag from remote repository |
| git show <tag> | Show tag details and associated commit |
Advanced Operations
| Command | Purpose |
| git rebase <branch> | Reapply commits on top of another branch |
| git cherry-pick <commit> | Apply specific commit to current branch |
| git bisect start | Begin binary search for problematic commit |
| git reflog | Show reference log of HEAD changes |
| git gc | Clean up and optimize repository |
| git submodule add <url> | Add a submodule to repository |
File Removal
| Command | Purpose |
| git rm <file> | Remove file from repository and working directory |
| git rm -r <folder> | Remove folder and its contents recursively |
| git rm –cached <file> | Remove file from repository but keep locally |
This comprehensive reference covers the most important Git commands that every developer should know, from basic repository operations to advanced workflow management. Each command serves a specific purpose in version control, collaboration, and project history management.