
Finding tedious creating an object with fields & loading data for the first time in your org, then switch to Salesforce Lightning Object Creator. It is a new tool to create custom object from spreadsheets with just a few clicks
What is the Lightning Object Creator?
Salesforce Lightning Object Creator is a new tool to create Spreadsheet into Custom Object with just a few clicks.
1. Navigation
Switch to Lightning Experience -> Go to Setup -> Object Manager -> Select Custom Object from Spreadsheet

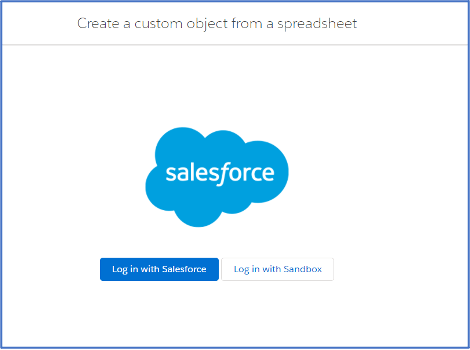
2. Choosing instance type
Choose the instance type (Production/Sandbox) that you will be creating the object in. Since I am in a developer org, I will be using the Production login i.e. Log in with Salesforce.
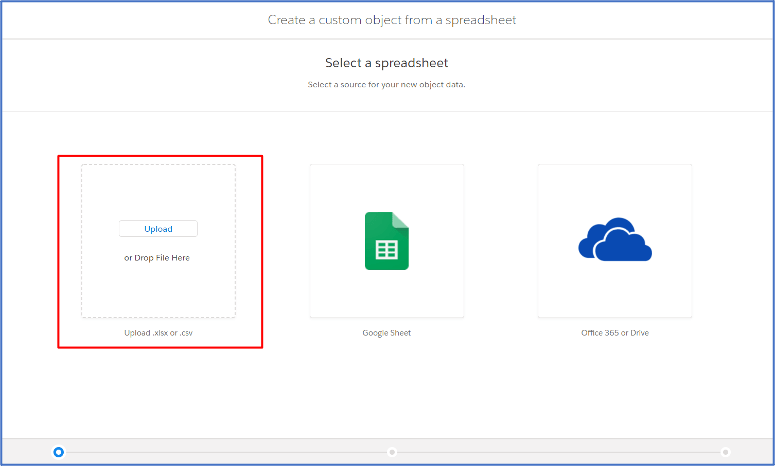
3. Choosing spreadsheet options
Now, choosing of spreadsheet. As you can see you have 3 options
- Your desktop, which will accept .csv or .xlsx.
- You can pull from Google Sheets.
- You can pull from OneDrive (Office365)
I will be using the option 1 i.e., choosing file from desktop.
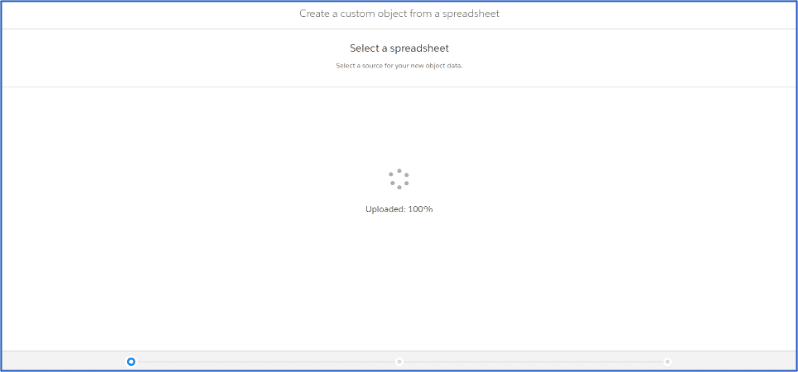
Once file is chosen from local system.
4. Customizing screen
After uploading the spreadsheet, Salesforce will automatically detect the fields. You can customize the Salesforce field name and field data type and you also can add field to page layout.
Let’s break this screen into different components & understand each in detail
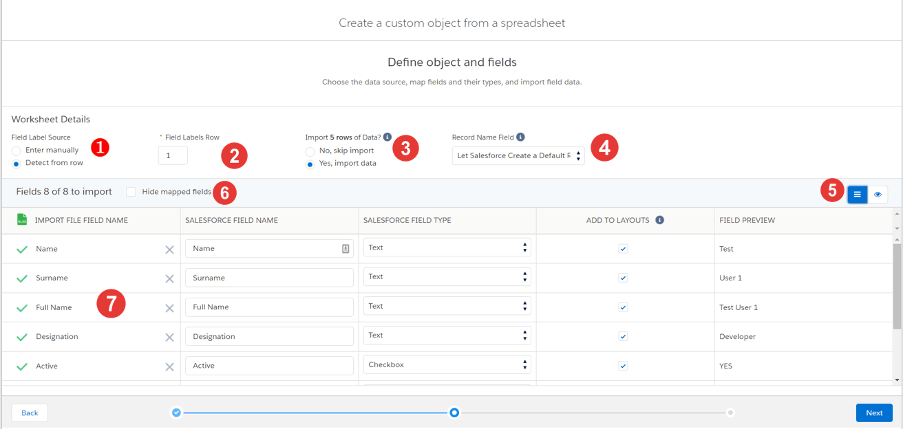
- This allows you to select whether you want the Field Names to be the names from the Column Headers of spreadsheet or you want to manually configure the Field Names.
- Use this to tell the Creator which row contains the Column Headers of spreadsheet.
- This selection allows you to decide whether to import the data simultaneously, or to wait and handle that later.

- This drop-down allows you to either let Salesforce decide the Record Name or you can use one of the Column Headers as the Record Name.
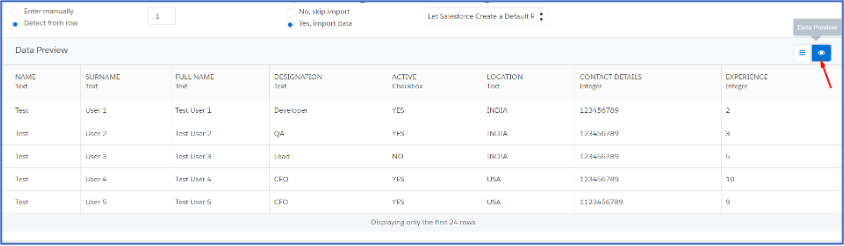
- This allows you to toggle the view you are in. In the screenshot above, I am in the List view; in the screenshot below, you can see how it looks like in the data view (data preview).
- If you have a lot of rows and some of them do not get mapped (see the green checkmark on the far-left side of the table), then you can use the Hide Mapped fields checkbox to get down to just the rows that are not mapped.
- This is the actual & final table of the mappings of your columns from spreadsheet to their respective names and data types.
*Make sure you review this thoroughly before proceeding further.
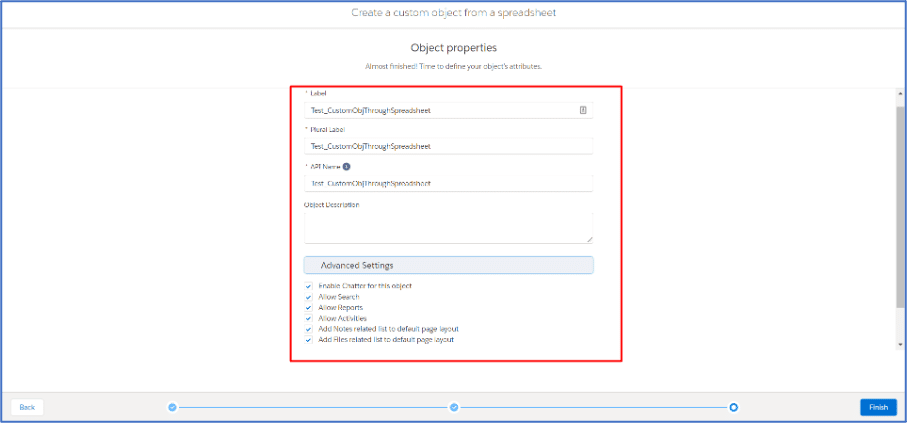
5. Defining Object Name
Click on the Next button in the right-hand corner. This will take you to the next screen which allows you to configure the name of the object with API Name & also enabling/disabling Advanced Settings options.
6. Final step of Creation
Click Finish. The Lightning Object Creator will then go through the process of creating everything.
To check out your newly created object go to Setup | Object Manager and Search for your object with the name you have defined in Step 4.
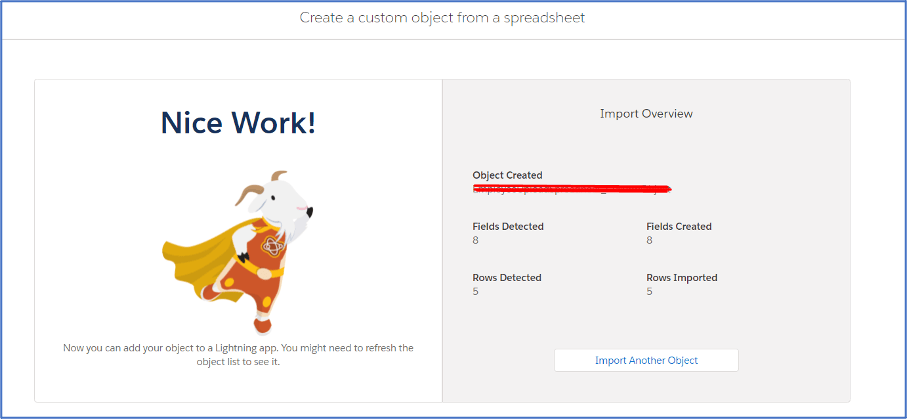
Hurryyy… Successfully you have created a New Custom object into your org through spreadsheet!!!


Would be a great tool if it supported the TIME field type.
Great post! The step-by-step guide on using the Lightning Object Creator is super helpful. I especially appreciated the examples you provided, which made it easier to understand how to convert spreadsheets into custom objects. Looking forward to more insights like this!
This post is a fantastic resource! The step-by-step guide to converting spreadsheet data into custom objects using Lightning Object Creator is incredibly helpful. I appreciate the detailed examples and clear explanations. Can’t wait to try this out in my own project!