
The classic approval process has been a staple in Salesforce for many years, providing a structured way to manage approvals. With the introduction of Salesforce Flow Approval Processes, users now have access to a more flexible and powerful alternative. Salesforce Flow Approval Processes allow for a more streamlined and customizable approach to handling approvals. They integrate seamlessly with other flows, enabling automation of complex business processes.
Using Salesforce Flow Approval Processes allows for a more dynamic and user-friendly approval experience compared to the classic approval processes.
Flow Approval Processes- Approval Orchestration Flow Types
Salesforce Flow Approval Processes serve as an enhanced alternative to the classic Approval Processes, offering greater flexibility and capabilities for managing approval workflows.
- Flexible, User-Friendly Interface: Create everything your approval process needs in Flow Builder.
- Record-Change Triggers: Automate approvals based on specific record updates.
- Apex Extensibility: Customize with Apex for advanced functionality.
- Detailed Logging: Ensure compliance with comprehensive audit trails.
- Dynamic Routing: Route approvals based on data and business rules.
Flow Approval Process Types
- Autolaunched Approval Orchestration (No Trigger): You can use this type of approval process to submit a record for approval manually using custom Apex, button, or Rest API.
- Record-triggered Approval Orchestration: This will automatically submit the record for approval when it is created or updated.

Guide to Set Up Salesforce Flow Approval Processes
Get started with Flow Approval Processes in the Approval app, where you can manage approval submissions, approval work items, and flow approval processes in one location. To create a new Approval Process in Salesforce using Salesforce Flow Approval Processes, follow these steps:
1. Open Approval App:
Click on App launcher and open the approval app.
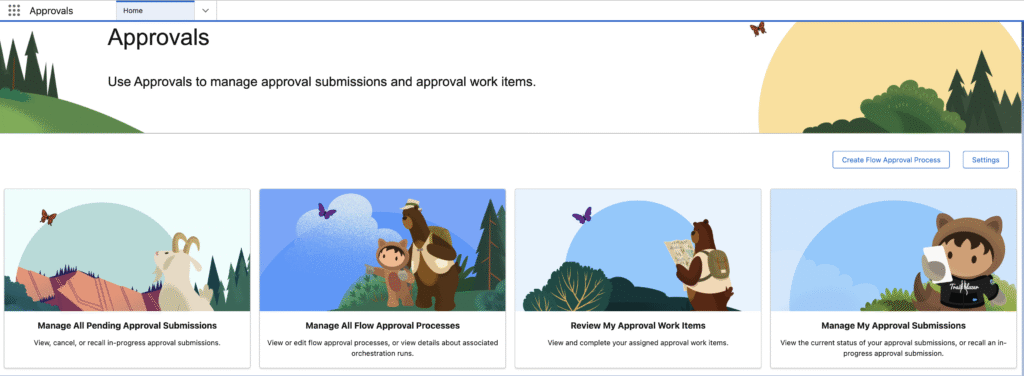
2. Create a flow Approval process:
Click the “Create flow Approval process” button.
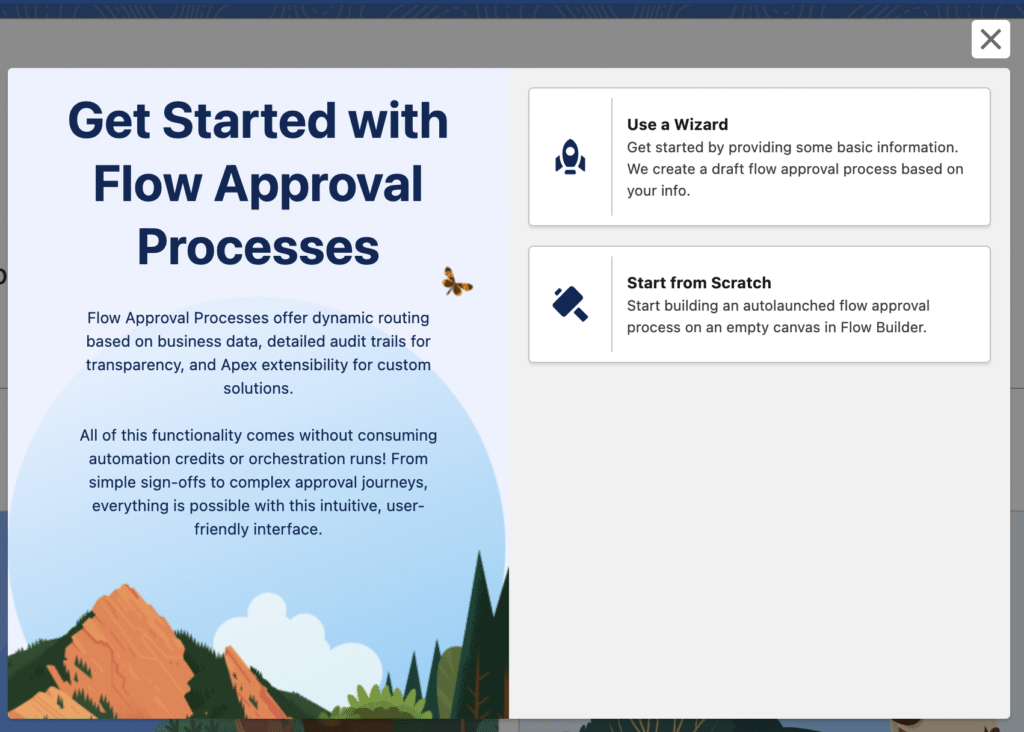
Then select one option. Let select the wizard option for the demo.
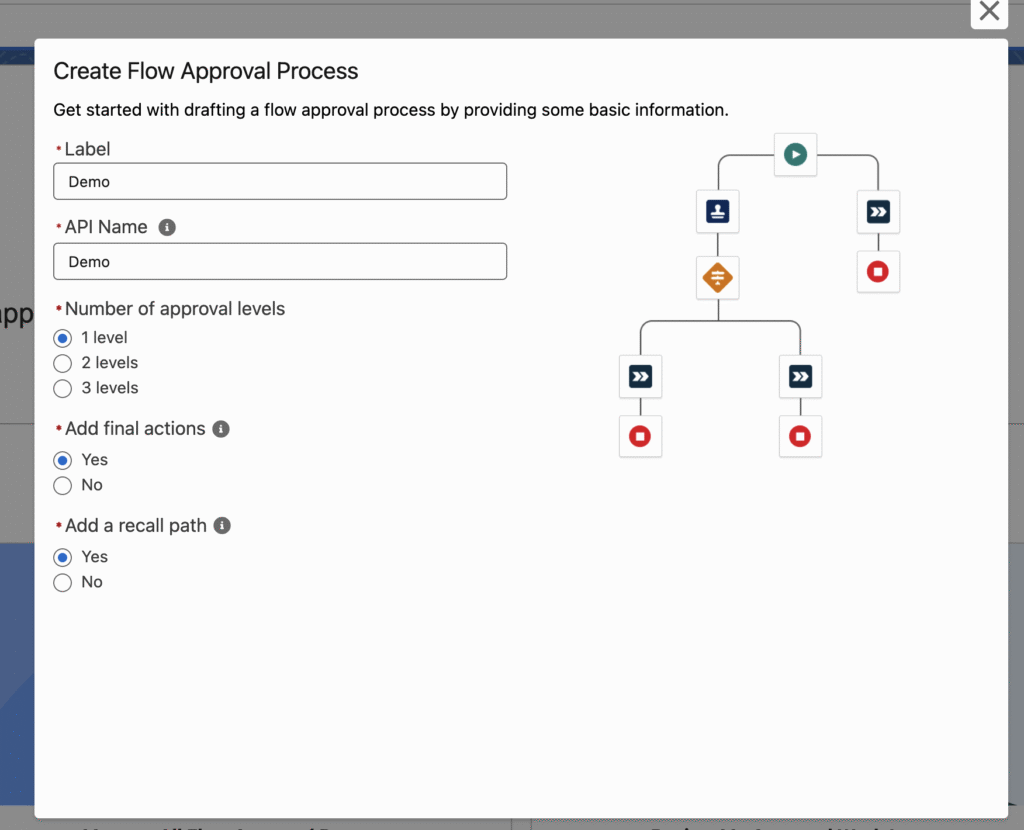
Then I will ask you for your name and confirm the number for approval required.
3. Configure Flow Approval Processes
It looks like by default
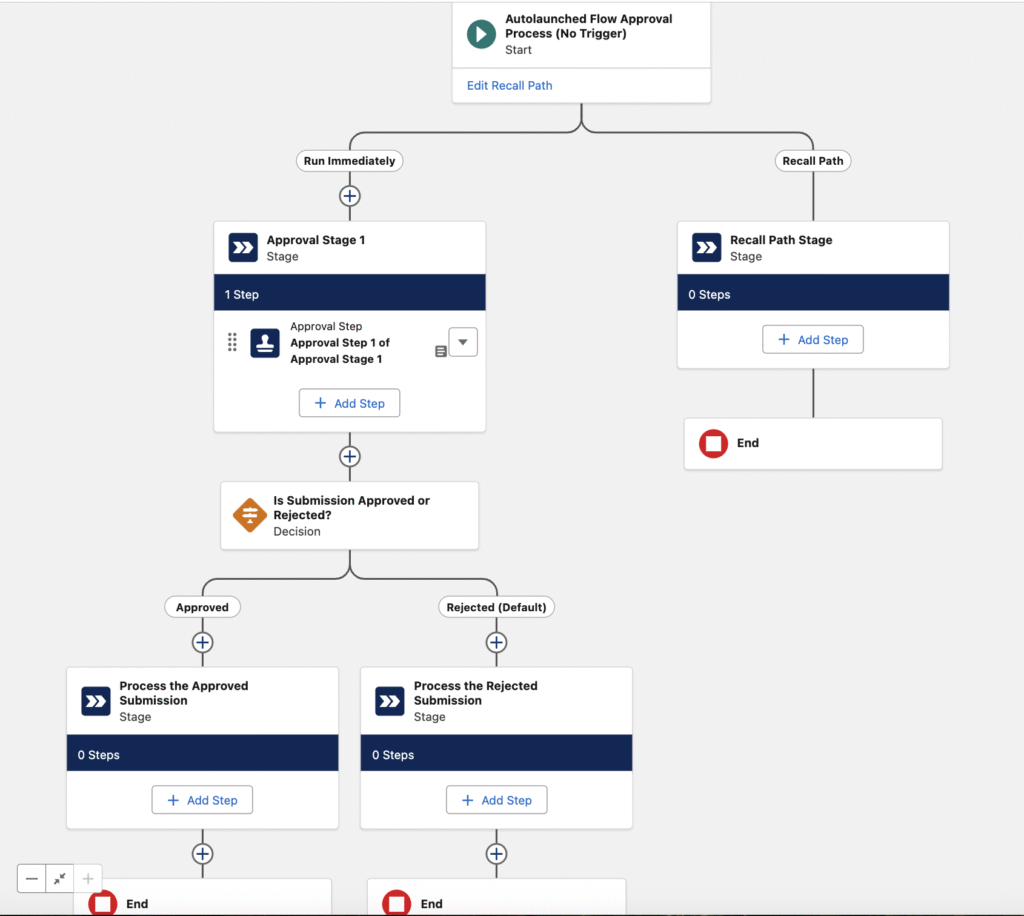
You need to configure the Approval step.
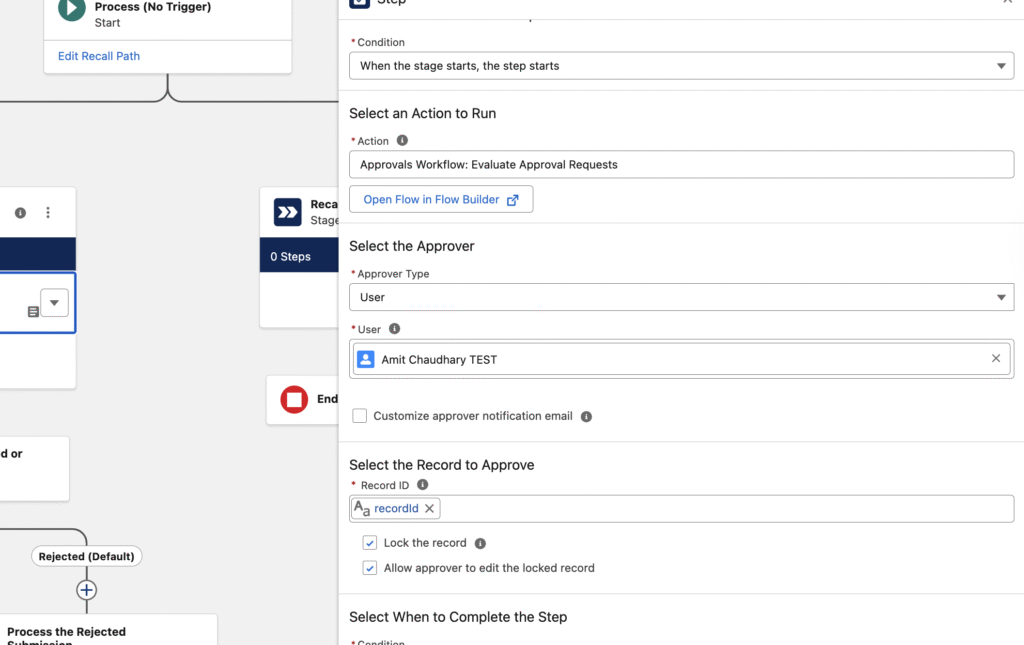
4. Configure Approval Step:
Select approver type and user.
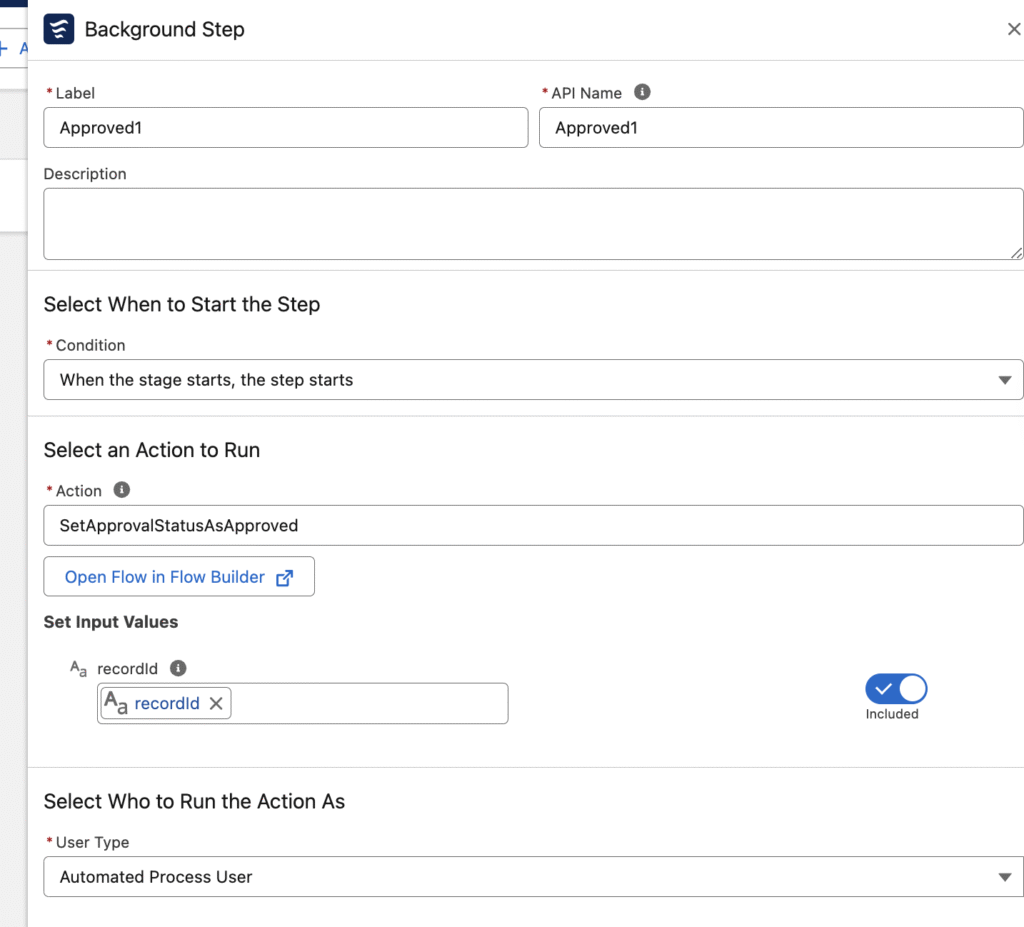
5. Add Field update on Approval

Add a background step and add an existing field update
6. Activate Your Flow.
Once you are satisfied with the performance, activate the flow to make it live.
Now you can trigger the approval process from a custom button
Difference Between Flow Approval Processes and Approval Processes
| Approval Processes | Flow Approval Processes |
| You can use the box submit for approval button. | You need to create a custom button to submit for approval from the button |
| Select the Next Approver Manually. This open is available | Not available |
| Use Approval History to see the history | Use Approval Trace for history |
Constideration
- No “Approval History” Related List
- Considerations for Migrating from Approval Processes
Learn more.


Hey, I noticed you mentioned that Flow Approval Processes are apex extensible. Is there any documentation that you can point me to?